How to set up metric's 'Data Entry Lock'
You can set up data entry restrictions for your metrics.
To set up the lock(s) for data entry:
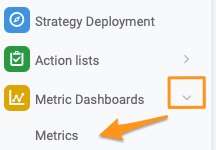
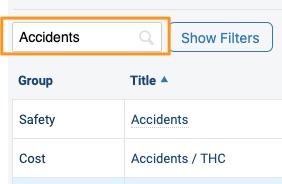
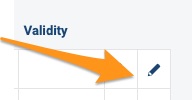
- Go to your metric’s settings - select Metrics from the Metric Dashboards module submenu, use the search window to find your metric, and click the edit pencil
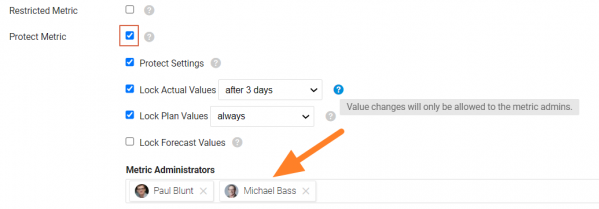
- Tick the box 'Protect Metric' and select your 'Metric Administrators' - it is recommended to check the Protect Settings field also to ensure that only authorized people can modify the settings of the metric
- Select the relevant box (Actual, Plan, Forecast values, or All the options) and choose the period for which the lock will apply.
Please note that the protection settings and data entry locks exclude Metric Administrators. They are the only ones who can modify the metric's settings and enter/change the metric's values.
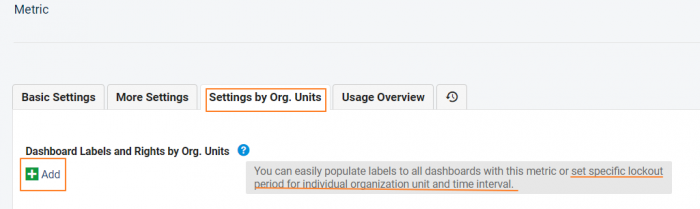
You can also set up different rules for specific parts of your organization in the 'Settings by Org. Units' tab.
To create such a rule:
- Click on the green plus button and select the unit(s) within the organizational structure, for which this rule will apply.
- Below the selected org. unit, you can enable 'Including Subfolders' if needed. The same rule can be set up for Projects (Action lists) and Partners.
- Choose if you want to set up Data Entry Lockout or Dashboard Labels.
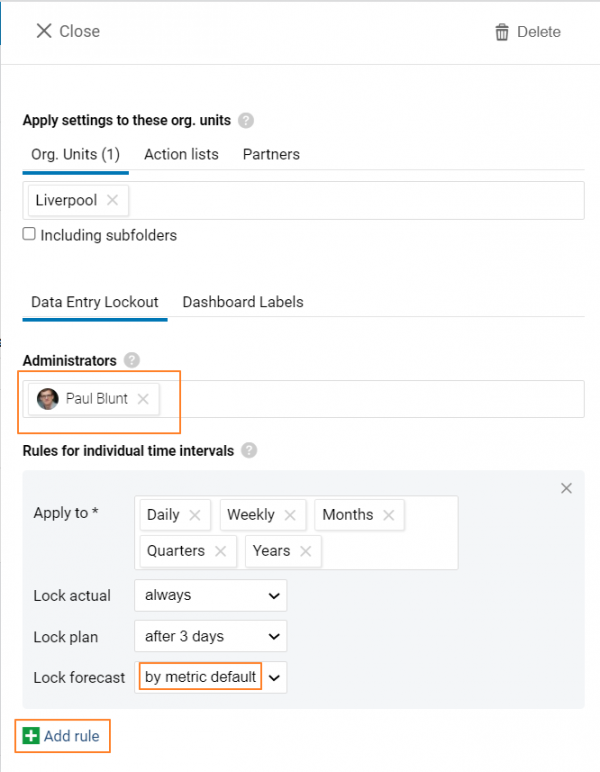
- Select an 'Administrators' who will have the rights for this part of org. structure and can enter/modify values per the lock setup.
- 'Apply to' - specify for which period this rule applies. You can select all or just some of them.
- Data entry Lock is set up individually for Actual, Plan, and Forecast values.
- 'By metric default' means that you want to apply the same rule as the one set up in the metric's basic settings.
Please note that you can create several rules for the same part of the organization. In that case, the stricter rule wins and applies.