How to create a new dashboard
You can use metric dashboards to track your metrics (KPIs) for different parts of your organization (e.g. sites), partners (suppliers or customers), or projects.
To create a new metric dashboard:
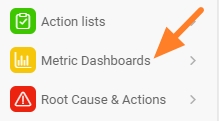
- Click on the Metric Dashboard's module
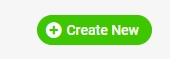
- Click on the Create New icon
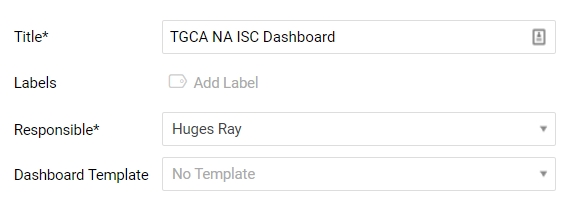
- Complete the main info such as Title, Responsible, etc.
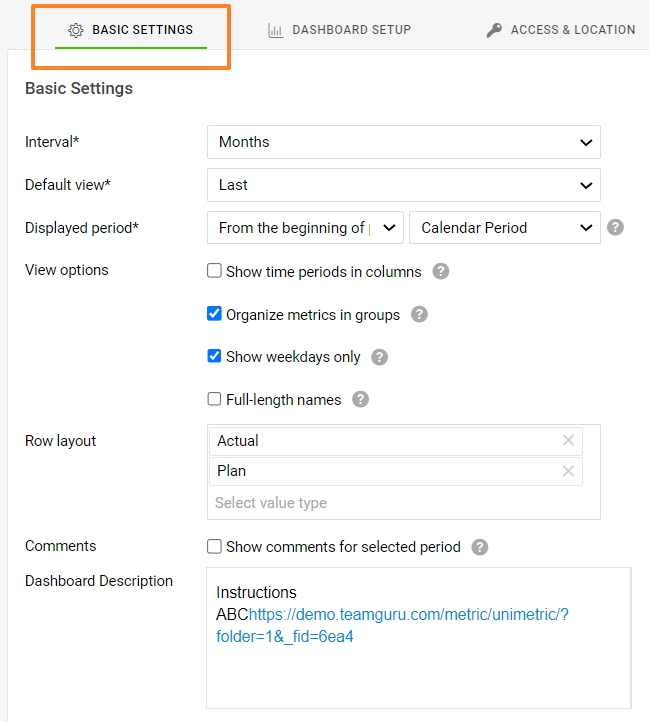
- Define default info in the Basic Settings tab such as Interval, Default view, etc.
- Once the basic data is filled in, click on the Save button.
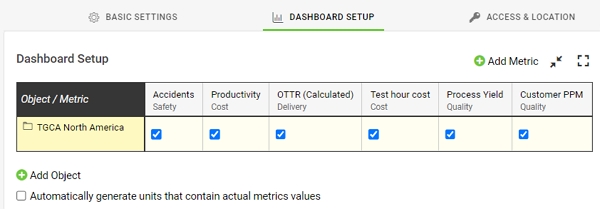
- In the Dashboard Setup tab, choose your organization unit(s) and metric(s) by clicking on the Add icons
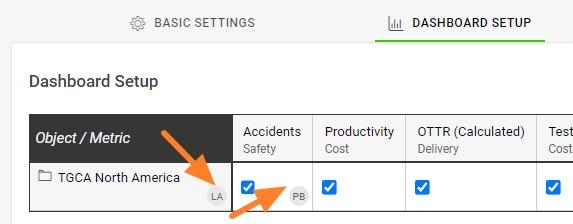
- Add Responsible, click either on your org. unit (if responsible for the whole site), or click into org. unit/metric cell (if responsible only for a specific metric.) Initials of responsible will be displayed next to it.
 Note: If the organization units are not set up in your TeamGuru yet, please see How I manage the organization structure. If the metric you want to track is not yet defined in the system see How to create a new metric. You have to be set up with a sufficient role.
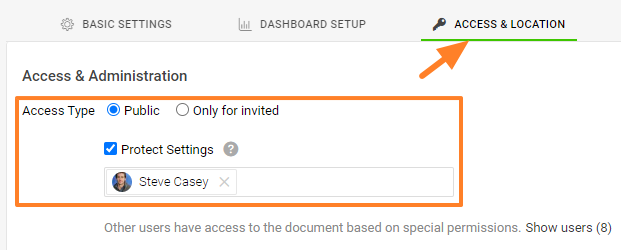
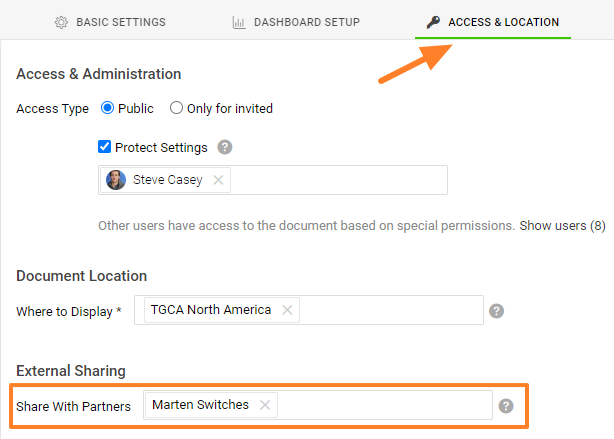
 - Go to the Access & Location tab and select the Access Type. Choose if you want to share your dashboard with everyone who has sufficient access or only with invited people. If you click 'Only for invited', choose the invitees from the submenu (must be set up as active or passive users in the system). Please note that passive users can only receive notifications if any are set up. Protect Settings - if you tick this box, only Responsible and selected document administrators can change the settings of this dashboard.
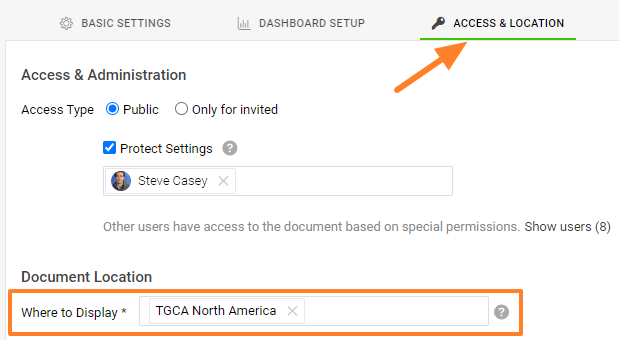
- Document Location - select where the new dashboard should be saved and displayed.
- You can share your document with External Partners. Select the existing partner(s) from the submenu. If you need to create a new partner in the system, please follow this link.
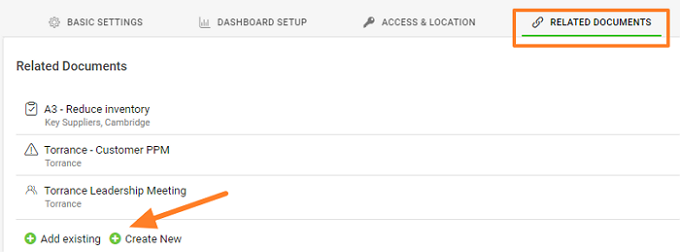
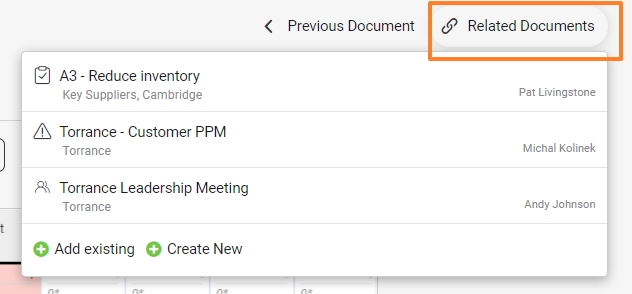
- Set up Related documents in a designated tab. Once set up, you will find these documents and live links under the Related documents button in the right upper corner above your document. You can also set up related documents directly from here.
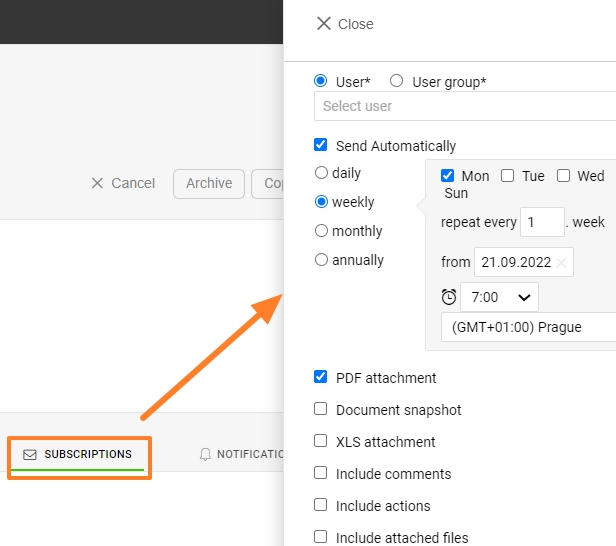
- Set up Subscriptions to receive a notification email.
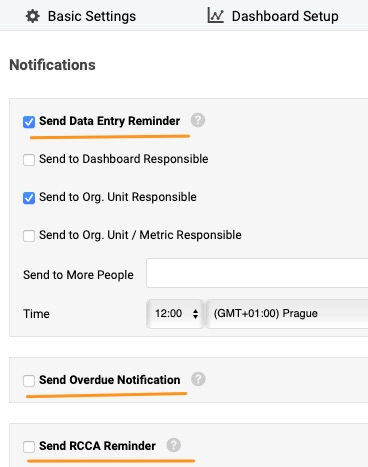
- Set up email Notifications to receive reminders.
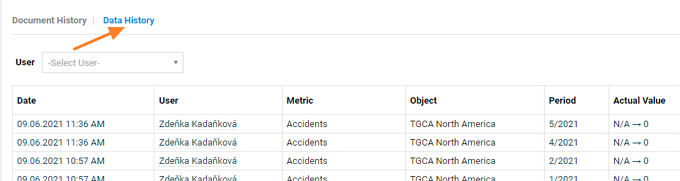
- Check a History log
 where you can see the document history or the data history
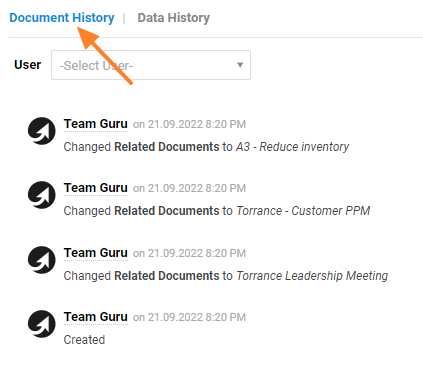
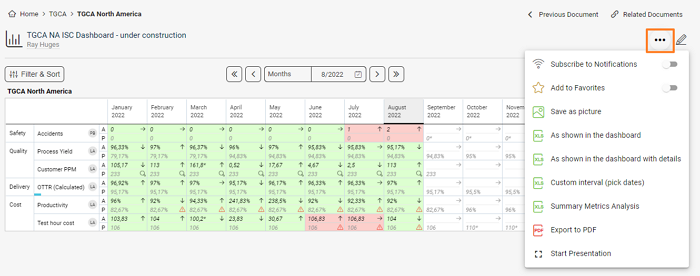
15. View your dashboard and use additional features. Subscribe to your document or add to Favorites, Save as picture, or choose different ways way you want to Export your dashboard to XLS or to PDF. You can also start presentation of your dashboard.
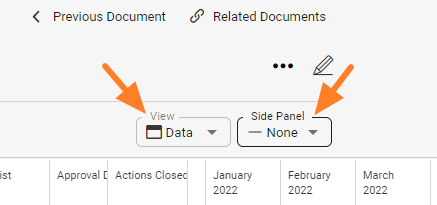
View option to see dashboard as Data, Spreadsheet or Charts and Side Panel offers you to see Attachments, Actions and Comments used in the dashbaords.
Video guide: Metric dashboards