How to set up approval process for the metric's data entry
Set up an approval process to ensure accurate and reliable metric data. These approval steps ensure data meets standards, reduce errors, and improve efficiency for your team's work on data integrity.
The approval process consists of four parts:
Part 1 - Establish User Groups for Approvers and Designated 'Whom to Inform' Users - *this part is not always needed.
Part 2 - Create Approval Template
Part 3 - Enable Approval in the Metric Settings
Part 4 - Follow the Approval Process for Your Data Entry
Please note that adequate permissions are necessary. Most of the following tasks are typically set up by the system administrator. If you do not have sufficient rights, please don't hesitate to contact your administrator for assistance.
*If the approval template is designed for a specific type of approval process with the same individuals contacted each time, you can directly select them within the template. Alternatively, you can leave the field blank and choose different individuals or groups for each metric separately, as outlined in Part 3 - Enable Approval in the Metric Settings.
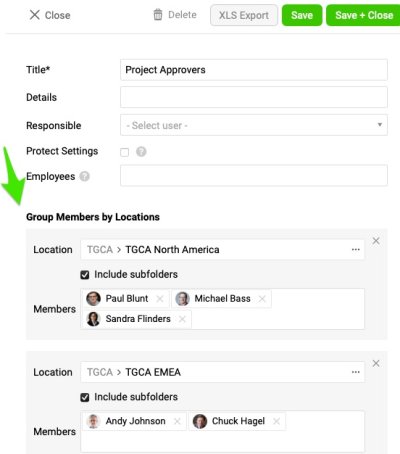
Part 1 - Establish User Groups for Approvers & Designated 'Whom to Inform' Users
- Go to Settings, then select User Groups and click on the +Create new button.
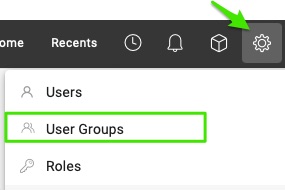

- Define your user group, where you can group members based on specific locations.
Part 2 - Create Approval Template (This template is typically set up by system administrators).
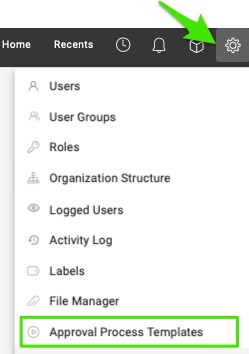
- Go to the Settings in the upper right corner and select Approval Process Templates.
- Click the +Create New button.

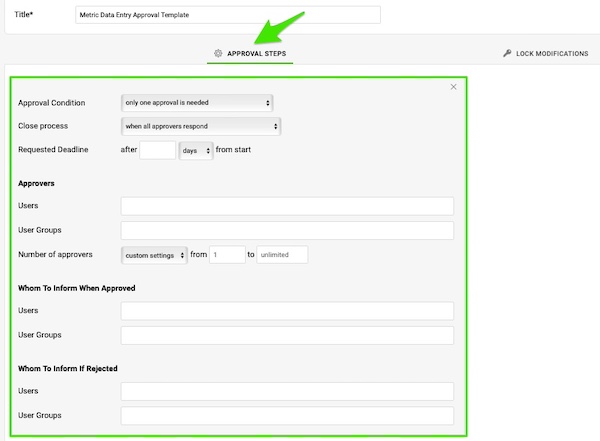
- Enter the title of your template and define your Approval steps. Please note that specifying Approvers is optional.
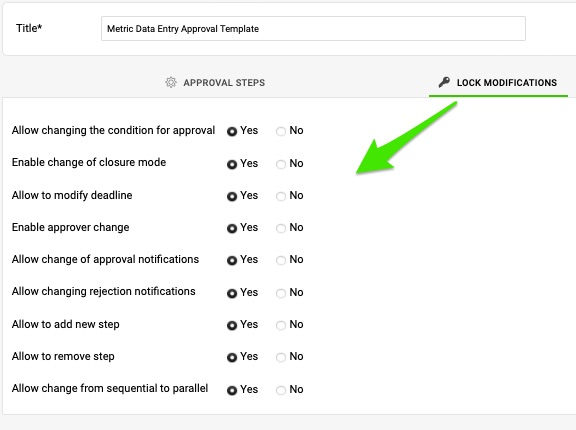
- Define your 'Lock Modifications'.
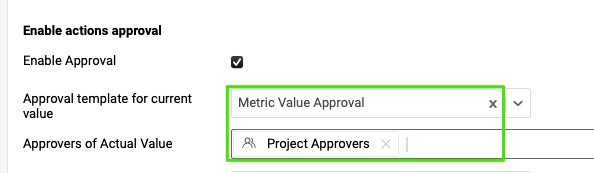
Part 3 - Enable Approval in the Metric Settings
- Go to the left panel and select Metrics from the Submenu in the Metric Dashboards module.
- Click the Edit pencil next to your metric.

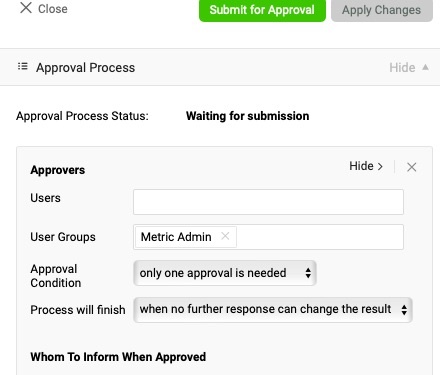
- In the More Settings Tab, check the box for Enable Approval.
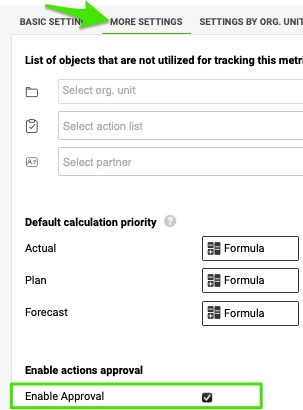
- Select the Approval template and your Approvers for Actual, Plan, and/or Forecast values.
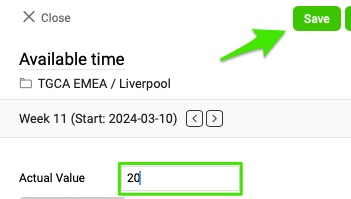
Part 4 - Follow the Approval Process for Your Data Entry
Responsible for data Entry:
- Enter your metric value and click the Save button.
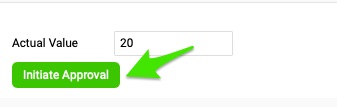
- Click the Initiate Approval and then Submit for Approval buttons.
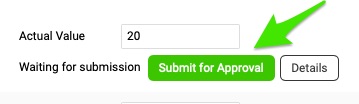
- In the Details section, you can view how the approval process is set up. Once you submit your request, the icon next to your value will display an 'Hourglass' icon.

Approver:
After the value is submitted for approval, you will receive an email notification. You can either click directly on the 'I APPROVE' link or proceed directly to the document.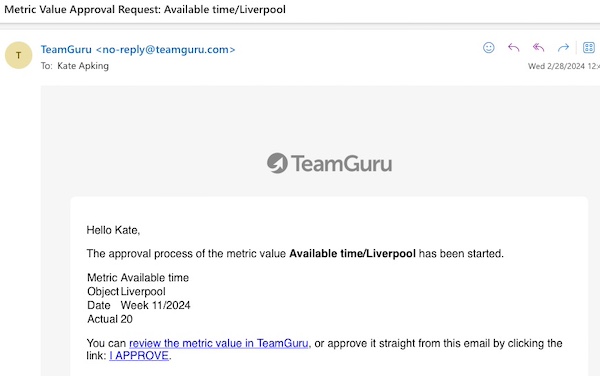
If you choose to reject, you can utilize the @mentionme feature in the comments section to provide more details for the Responsible.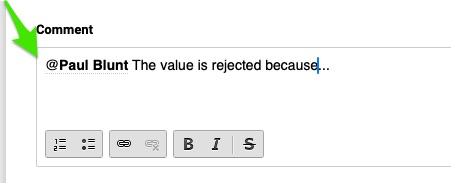
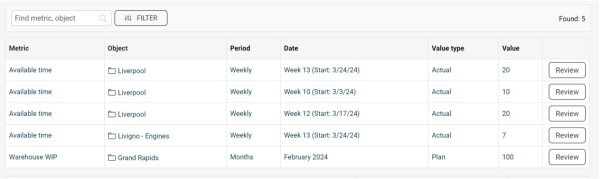
Efficiently filter and sort the metrics based on those requiring your approval or by their approval status. 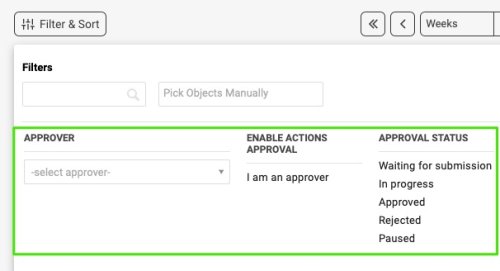
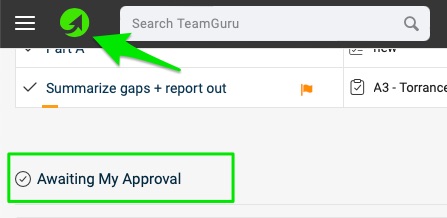
The approver will also see all metrics awaiting approval in the 'My Dashboard' page under the 'Awaiting My Approval' section.