Data Entry and View Restrictions
In this article, you’ll learn how to lock specific values or time periods for data entry, and how to assign specific users to view or enter them.
Restrict data entry with rules
Set up rules that control which users have access to certain values, and designate who is responsible for entering the metric data.
Rules can be applied universally to all objects for which the metric is tracked (Default Rule), or targeted to selected objects (Rules for Selected Objects).
Data entry: default rule
How the default rule works
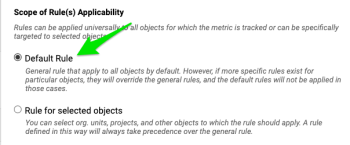
This rule applies to all objects by default. However, if more specific rules exist for certain objects, they override the default rule, which then does not apply to those objects.
If you don’t set up a default rule, all time intervals and values are automatically open for data entry by all users across the system, provided they have sufficient folder access.
-
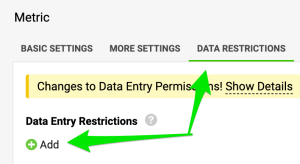
Add a rule. Go to the metric settings, open the Data Restrictions tab and click the green +Add icon.
-
Select the default rule. Select the Default Rule option.
-
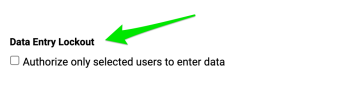
Set the data entry lockout. Use Data Entry Lockout if you need to limit data entry to specific individuals or groups across the entire organization, or leave it open for more specific settings under individual objects (described below in “Rules for Selected Objects”).
-
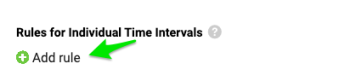
Add rules for time intervals. Move to the Rules for Individual Time Intervals section and click the green +Add icon.
In this section, you can set up the following:
a) Select the time periods to which this rule applies, or leave the field empty to apply it to all intervals.
b) Choose a Lock option that fits your data entry needs, separately for your Actual, Plan and Forecast data.
c) Create additional rules if needed.
d) Select the Administrators who can override this rule and enter data during locked periods if necessary.
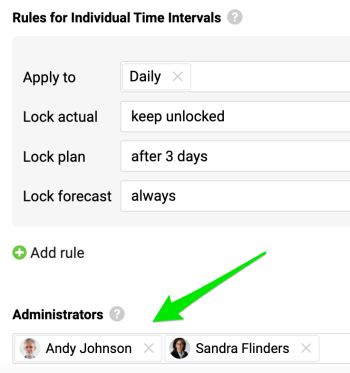
In the example above, daily values remain open for all users. Plan values are locked for data entry three days after the time period ends (e.g. if your week runs from Sunday to Saturday, data entry is locked at midnight on Wednesday). Forecast values are locked as well. In this case, only administrators can enter plan values after the three-day period and enter forecast values.
-
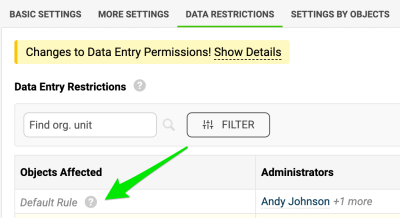
Check the created rule. When you complete your selection, close the window. Your default rule is created and marked accordingly.
Data entry: rules for selected objects
How targeted rules work
You can specify the organizational units, projects or other objects to which the rules apply. These targeted rules always take precedence over the default rule.
-
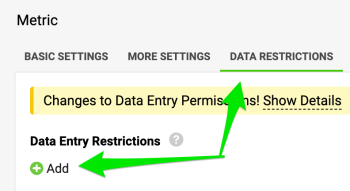
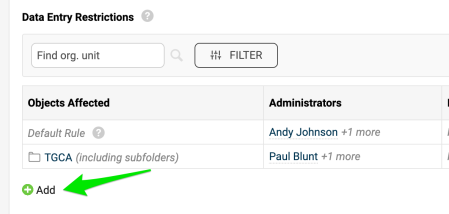
Add a rule. Go to the metric settings, open the Data Restrictions tab and click the green +Add icon.
-
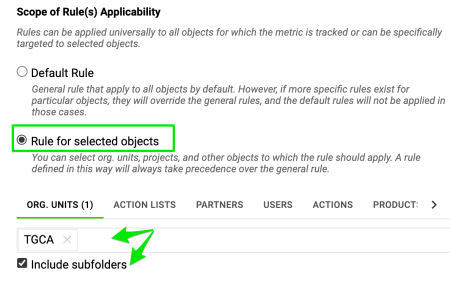
Select rules for selected objects. Select the Rules for Selected Objects option.
-
Choose the objects. Choose the Object(s) to which this rule applies (org. units, action lists, partners, etc.). Include subfolders if applicable.
-
Set the data entry lockout. Use Data Entry Lockout if you need to limit data entry to specific individuals or groups for these selected objects, or leave it unchecked to allow all users with data entry rights for the selected objects.
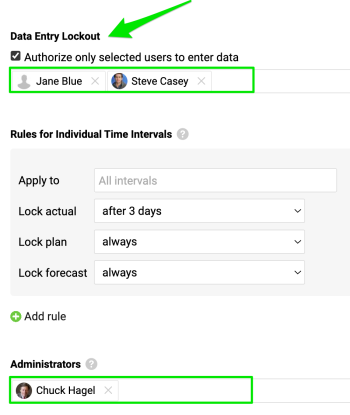
In the example above, only Jane and Steve can enter Actual data during the selected period, until it is locked three days after the time period ends. Administrator Chuck Hagel can modify Actual values at any time. The Plan and Forecast values are locked and can only be changed by Administrator Chuck Hagel.
-
Add rules for time intervals. Move to the Rules for Individual Time Intervals section and click the green +Add icon.
In this section, you can set up the following:
a) Select the time periods to which this rule applies, or leave the field empty to apply it to all intervals.
b) Choose the Lock option that fits your data entry needs for Actual, Plan and Forecast data.
c) Create additional rules if necessary by clicking the +Add rule icon.
d) Select the Administrators who can override this rule and enter data during locked periods if needed.
e) Select the Labels that will be applied to all objects and metrics displayed on any metric dashboard.
f) Next, assign the administrators who will be able to enter data during the locked periods.
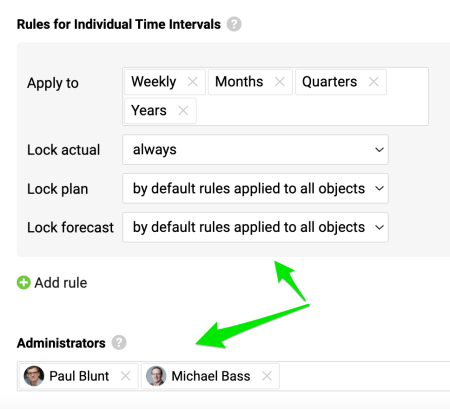
If you set the Lock option to “by default rules applied to all objects”, only the administrators selected for the default rule can enter data.

In this example, only Paul and Michael can enter Weekly, Monthly, Quarterly and Yearly Actual values. Plan and Forecast values, however, follow the locks and administrators specified in the default rule.
-
Add more rules. Add multiple rules if needed with the green +Add icon. Each rule works independently, with its own assigned administrators.
Data view restrictions
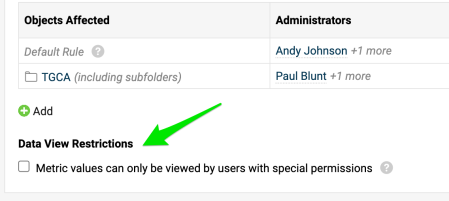
Restrict who can view values
Make sure that metric values can be viewed only by users with specific permissions. Sufficient access is required; your system administrators can configure it.
Still need help?
Write to us. We usually reply within an hour on business days.