数据录入和查看限制
本文由英文机器翻译。 当前显示英文原文。
In this article, you’ll learn how to lock specific values or time periods for data entry, and how to assign specific users to view or enter them.
Restrict data entry with rules
Set up rules that control which users have access to certain values, and designate who is responsible for entering the metric data.
Rules can be applied universally to all objects for which the metric is tracked (Default Rule), or targeted to selected objects (Rules for Selected Objects).
Data entry: default rule
How the default rule works
This rule applies to all objects by default. However, if more specific rules exist for certain objects, they override the default rule, which then does not apply to those objects.
If you don’t set up a default rule, all time intervals and values are automatically open for data entry by all users across the system, provided they have sufficient folder access.
-
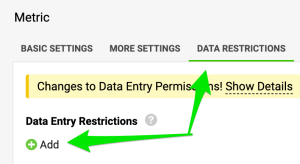
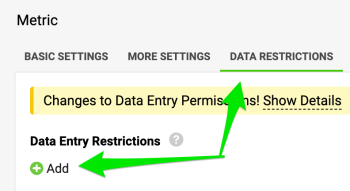
Add a rule. Go to the metric settings, open the Data Restrictions tab and click the green +Add icon.
-
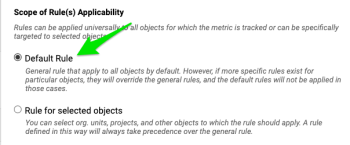
Select the default rule. Select the Default Rule option.
-
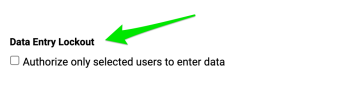
Set the data entry lockout. Use Data Entry Lockout if you need to limit data entry to specific individuals or groups across the entire organization, or leave it open for more specific settings under individual objects (described below in “Rules for Selected Objects”).
-
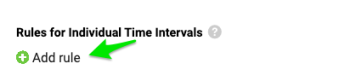
Add rules for time intervals. Move to the Rules for Individual Time Intervals section and click the green +Add icon.
In this section, you can set up the following:
a) Select the time periods to which this rule applies, or leave the field empty to apply it to all intervals.
b) Choose a Lock option that fits your data entry needs, separately for your Actual, Plan and Forecast data.
c) Create additional rules if needed.
d) Select the Administrators who can override this rule and enter data during locked periods if necessary.
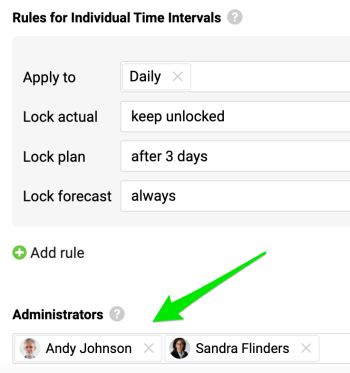
In the example above, daily values remain open for all users. Plan values are locked for data entry three days after the time period ends (e.g. if your week runs from Sunday to Saturday, data entry is locked at midnight on Wednesday). Forecast values are locked as well. In this case, only administrators can enter plan values after the three-day period and enter forecast values.
-
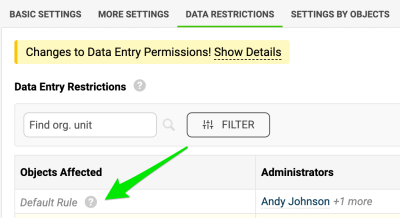
Check the created rule. When you complete your selection, close the window. Your default rule is created and marked accordingly.
Data entry: rules for selected objects
How targeted rules work
You can specify the organizational units, projects or other objects to which the rules apply. These targeted rules always take precedence over the default rule.
-
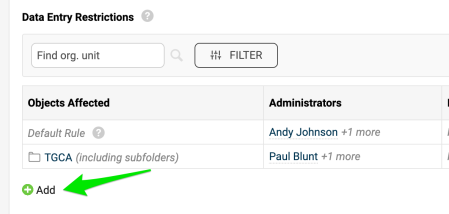
Add a rule. Go to the metric settings, open the Data Restrictions tab and click the green +Add icon.
-
Select rules for selected objects. Select the Rules for Selected Objects option.
-
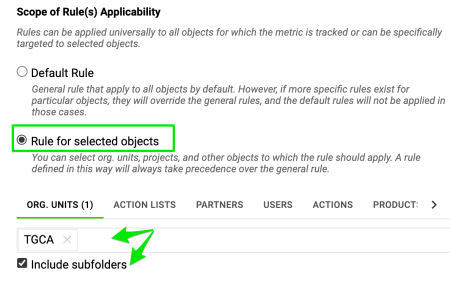
Choose the objects. Choose the Object(s) to which this rule applies (org. units, action lists, partners, etc.). Include subfolders if applicable.
-
Set the data entry lockout. Use Data Entry Lockout if you need to limit data entry to specific individuals or groups for these selected objects, or leave it unchecked to allow all users with data entry rights for the selected objects.
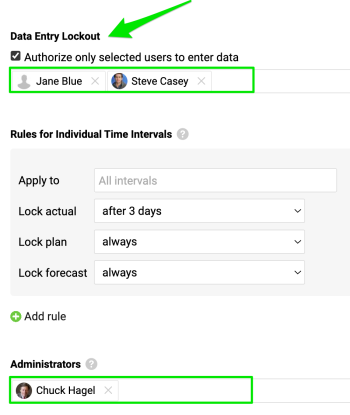
In the example above, only Jane and Steve can enter Actual data during the selected period, until it is locked three days after the time period ends. Administrator Chuck Hagel can modify Actual values at any time. The Plan and Forecast values are locked and can only be changed by Administrator Chuck Hagel.
-
Add rules for time intervals. Move to the Rules for Individual Time Intervals section and click the green +Add icon.
In this section, you can set up the following:
a) Select the time periods to which this rule applies, or leave the field empty to apply it to all intervals.
b) Choose the Lock option that fits your data entry needs for Actual, Plan and Forecast data.
c) Create additional rules if necessary by clicking the +Add rule icon.
d) Select the Administrators who can override this rule and enter data during locked periods if needed.
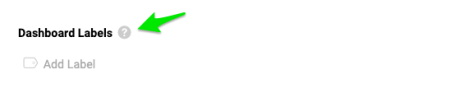
e) Select the Labels that will be applied to all objects and metrics displayed on any metric dashboard.
f) Next, assign the administrators who will be able to enter data during the locked periods.
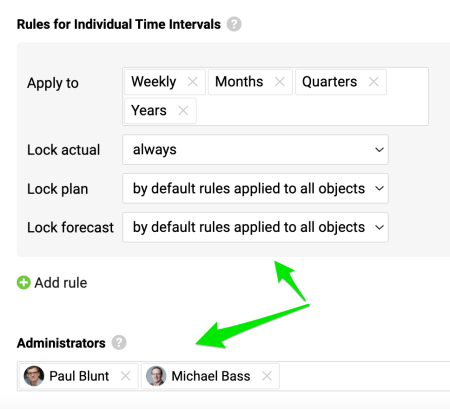
If you set the Lock option to “by default rules applied to all objects”, only the administrators selected for the default rule can enter data.

In this example, only Paul and Michael can enter Weekly, Monthly, Quarterly and Yearly Actual values. Plan and Forecast values, however, follow the locks and administrators specified in the default rule.
-
Add more rules. Add multiple rules if needed with the green +Add icon. Each rule works independently, with its own assigned administrators.
Data view restrictions
Restrict who can view values
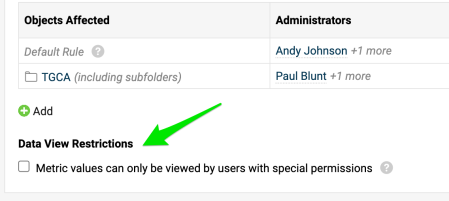
Make sure that metric values can be viewed only by users with specific permissions. Sufficient access is required; your system administrators can configure it.
本文介绍如何锁定特定数值或时间段的数据录入,以及如何指定可以查看或录入这些数据的用户。
通过规则限制数据录入
设置规则,控制哪些用户可以访问特定数值,并指定由谁负责录入指标数据。
规则可以统一应用于跟踪该指标的所有对象(默认规则),也可以只针对选定的对象(选定对象的规则)。
数据录入:默认规则
默认规则的作用方式
此规则默认适用于所有对象。但如果某些对象有更具体的规则,这些规则会覆盖默认规则,默认规则将不再适用于这些对象。
如果不设置默认规则,所有时间间隔和数值都会自动向系统中的所有用户开放数据录入,前提是用户拥有足够的文件夹访问权限。
-
添加规则。 进入指标设置,打开数据限制选项卡,点击绿色的 +添加图标。
-
选择默认规则。 选择默认规则选项。
-
设置数据录入锁定。 如果需要在整个组织范围内将数据录入限定给特定人员或用户组,请使用数据录入锁定;也可以保持开放,在各个对象下进行更具体的设置(见下文“选定对象的规则”)。
-
添加时间间隔规则。 转到各时间间隔的规则部分,点击绿色的 +添加图标。
在此部分中,您可以进行以下设置:
a) 选择此规则适用的时间段,或将该字段留空,使其适用于所有时间间隔。
b) 为实际、计划和预测数据分别选择符合数据录入需求的锁定选项。
c) 如有需要,创建其他规则。
d) 选择管理员,必要时他们可以覆盖此规则,在锁定期间录入数据。
在上面的示例中,每日数值对所有用户保持开放。计划值在时间段结束三天后锁定数据录入(例如,如果您的一周是从周日到周六,则数据录入会在周三午夜锁定)。预测值也被锁定。在这种情况下,三天期限过后,只有管理员可以录入计划值,预测值也只能由管理员录入。
-
检查已创建的规则。 完成选择后关闭窗口。默认规则即创建完成,并有相应标记。
数据录入:选定对象的规则
针对性规则的作用方式
您可以指定规则适用的组织单元、项目或其他对象。这些针对性规则始终优先于默认规则。
-
添加规则。 进入指标设置,打开数据限制选项卡,点击绿色的 +添加图标。
-
选择选定对象的规则。 选择选定对象的规则选项。
-
选择对象。 选择此规则适用的对象(组织单元、行动清单、合作伙伴等)。如适用,请包含子文件夹。
-
设置数据录入锁定。 如果需要将这些选定对象的数据录入限定给特定人员或用户组,请使用数据录入锁定;如果不勾选,则所有对选定对象有数据录入权限的用户都可以录入。
在上面的示例中,只有Jane和Steve可以在所选期间录入实际数据,直到时间段结束三天后锁定。管理员Chuck Hagel可以随时修改实际值。计划值和预测值已锁定,只能由管理员Chuck Hagel更改。
-
添加时间间隔规则。 转到各时间间隔的规则部分,点击绿色的 +添加图标。
在此部分中,您可以进行以下设置:
a) 选择此规则适用的时间段,或将该字段留空,使其适用于所有时间间隔。
b) 为实际、计划和预测数据选择符合数据录入需求的锁定选项。
c) 如有需要,点击 +添加规则图标创建其他规则。
d) 选择管理员,必要时他们可以覆盖此规则,在锁定期间录入数据。
e) 选择标签,这些标签将应用于任何指标仪表板上显示的所有对象和指标。
f) 接下来,指定可以在锁定期间录入数据的管理员。
如果将锁定选项设为“按适用于所有对象的默认规则”,则只有为默认规则选定的管理员可以录入数据。
在此示例中,只有Paul和Michael可以录入每周、每月、每季度和每年的实际值。而计划值和预测值则遵循默认规则中指定的锁定和管理员设置。
-
添加更多规则。 如有需要,可以点击绿色的 +添加图标添加多条规则。每条规则独立生效,并有各自指定的管理员。
数据查看限制
限制可查看数值的人员
确保只有具有特定权限的用户才能查看指标数值。此操作需要足够的访问权限,可由系统管理员进行配置。
还需要帮助吗?
请给我们留言。工作日我们通常会在一小时内回复。