Como criar uma nova RCCA e vinculá-la a uma métrica
Tradução automática do inglês. Exibindo o original em inglês.
You can create a root cause analysis (RCCA) report and link it to a particular metric dashboard.
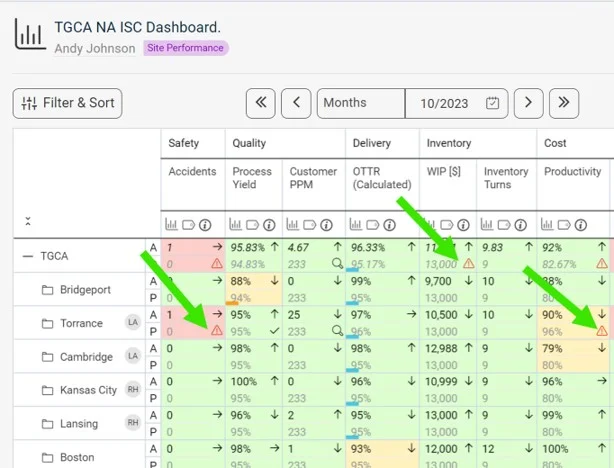
See the RCCA icon in the dashboard
Once the RCCA document is linked to a certain metric/unit combination, the RCCA icon is displayed in the dashboard, as shown below.
Create the RCCA document
-
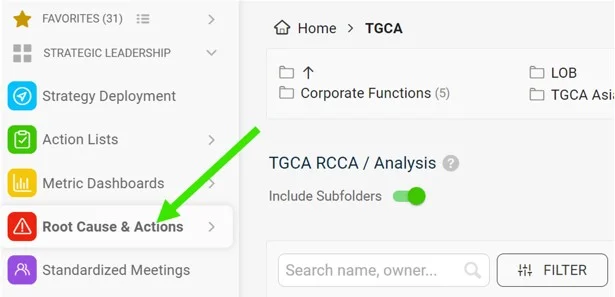
Open the Root Cause & Actions module. Go to the Root Cause & Actions module on the left-hand side of the screen.
-
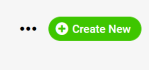
Click Create New. Click Create New on the right side of the screen.
-
Add a title and choose the type. Add a title and choose the type of RCCA.
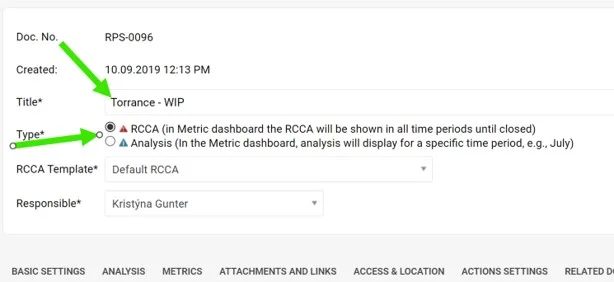
There are two types of RCCA. The only difference is how long the RCCA icon (a triangle) is displayed in the metric dashboard, if it is a metric-related RCCA document. The red RCCA (1st option) displays the red triangle icon in the dashboard the whole time until the RCCA document is closed. The blue RCCA (2nd option) displays the blue triangle icon in the metric dashboard only for the default period of the metric dashboard (e.g. in a weekly dashboard only for the week, in a monthly dashboard only for the month in which the RCCA document was created).
-
Select the RCCA template.
-
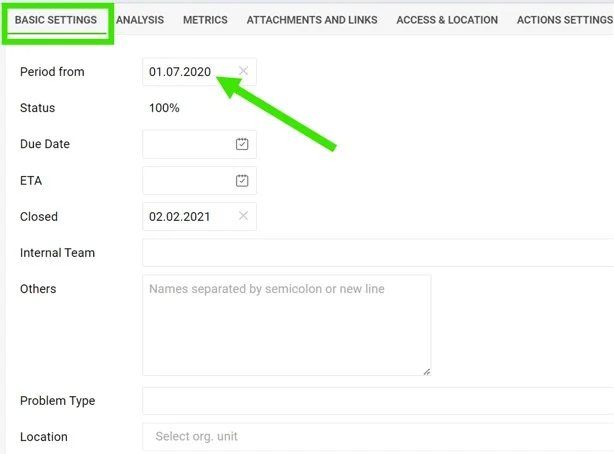
Fill in the details. Fill in the details under each of the tabs. In Basic Settings, it is important to fill in the Period from which the RCCA icon will be displayed in the metric dashboard (if the RCCA document is metric-related).
-
Fill in the analysis. The analysis and Pareto charts can be filled in on the 2nd tab, Analysis.
-
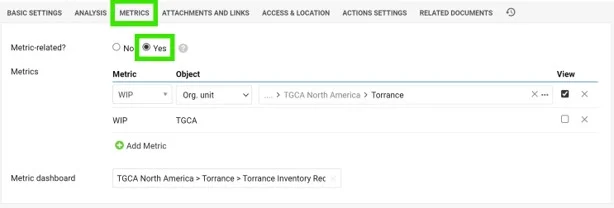
Link the metric. To link the RCCA document to a certain metric/unit combination, set it up under the 3rd tab, Metrics. Here you can also link a particular metric dashboard.
Video guide: creating a new RCCA
Você pode criar um relatório de análise de causa raiz (RCCA) e vinculá-lo a um dashboard de KPI específico.
Ver o ícone de RCCA no dashboard
Depois que o documento RCCA é vinculado a uma combinação de métrica e unidade, o ícone de RCCA aparece no dashboard, como mostrado abaixo.
Criar o documento RCCA
-
Abra o módulo Análise de causa raiz e ações corretivas. Acesse o módulo Análise de causa raiz e ações corretivas no lado esquerdo da tela.
-
Clique em Criar novo. Clique em Criar novo no lado direito da tela.
-
Adicione um título e escolha o tipo. Adicione um título e escolha o tipo de RCCA.
Há dois tipos de RCCA. A única diferença é por quanto tempo o ícone de RCCA (um triângulo) aparece no dashboard de KPI, quando o documento RCCA está ligado a uma métrica. A RCCA vermelha (1ª opção) mostra o triângulo vermelho no dashboard o tempo todo, até o documento RCCA ser encerrado. A RCCA azul (2ª opção) mostra o triângulo azul no dashboard de KPI apenas durante o período padrão do dashboard (por exemplo, em um dashboard semanal, só na semana; em um dashboard mensal, só no mês em que o documento RCCA foi criado).
-
Selecione o modelo de RCCA.
-
Preencha os detalhes. Preencha os detalhes em cada aba. Em Configurações básicas, é importante preencher o Período a partir do qual o ícone de RCCA aparecerá no dashboard de KPI (se o documento RCCA estiver ligado a uma métrica).
-
Preencha a análise. A análise e os gráficos de Pareto são preenchidos na 2ª aba, Análise.
-
Vincule a métrica. Para vincular o documento RCCA a uma combinação de métrica e unidade, configure isso na 3ª aba, Métricas. Ali você também pode vincular um dashboard de KPI específico.
Vídeo: como criar uma nova RCCA
Precisa de mais ajuda?
Escreva para nós. Em dias úteis, costumamos responder em até uma hora.