How to create a new action list (project)
Manage all project and meeting actions in one place and standardize project management across your company with ease. You receive an automatic notification when a task is assigned or due for completion, and on-time closure statistics drive the right behaviors.
Create a new action list
Go to the Action Lists module and click the Create New add icon.
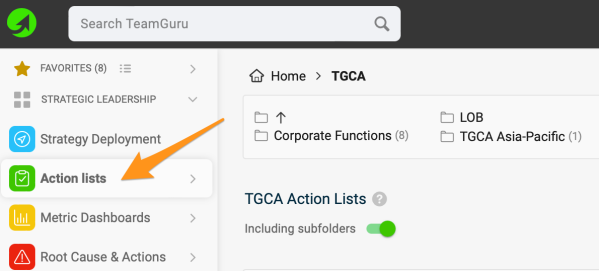

Complete the project header
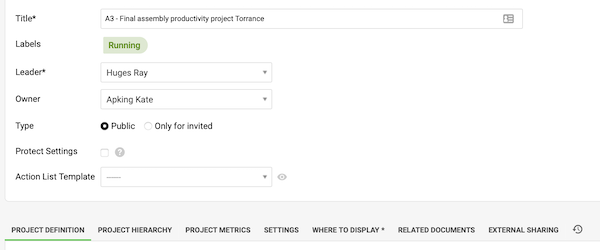
Complete the project header definition (Project Charter) and the settings under the individual tabs.
-
Set the access. Decide whether the action list is public (everyone with access to this folder in your organization structure can enter it), or set it to Only for invited and select the individuals who can enter it. If you tick Protect Settings, only the leader, the owner and the document administrators can modify the project settings.
-
Capture the project goals. Use the Project Metrics tab to capture the project goals. Note: To collect project metrics regularly and keep their history, create a dashboard in the Metric Dashboards module and set it as a Related Document of your action list.
-
Choose where to display it. Choose the org. unit(s) in the Where to display folder. This determines where the document is saved (it can be in one or more places).
-
Save the action list. Click Save & View.
-
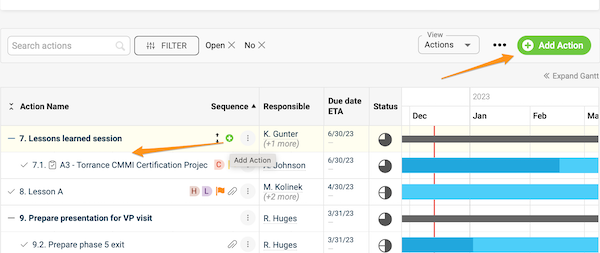
Add actions. Start adding main actions with the Add (plus) Action icon, or sub-actions with the green plus button next to a main action.
-
Read more. See the related articles for further instructions.
Watch the video guide
Still need help?
Write to us. We usually reply within an hour on business days.