如何为指标数据录入设置审批流程
本文由英文机器翻译。 当前显示英文原文。
Set up an approval process to keep your metric data accurate and reliable. The approval steps make sure the data meets your standards, reduce errors and make your team’s work on data integrity more efficient.
The approval process consists of four parts:
- Part 1 – Establish user groups for approvers and designated “Whom to inform” users (this part is not always needed*)
- Part 2 – Create an approval template
- Part 3 – Enable approval in the metric settings
- Part 4 – Follow the approval process for your data entry
Adequate permissions are necessary. Most of the following tasks are typically set up by the system administrator. If you do not have sufficient rights, please contact your administrator for assistance.
*If the approval template is designed for a specific type of approval process that contacts the same people each time, you can select them directly in the template. Alternatively, leave the field blank and choose different people or groups for each metric separately, as described in Part 3 – Enable approval in the metric settings.
Part 1 – Establish user groups for approvers and “Whom to inform” users
-
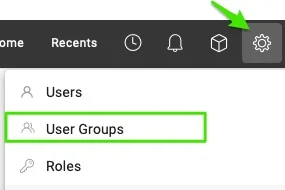
Create a user group. Go to Settings, select User Groups and click the + Create New button.
-
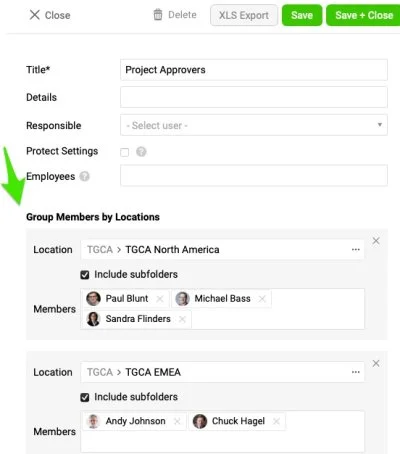
Define the user group. Set up your user group; you can group members based on specific locations.
Part 2 – Create an approval template
The approval template is typically set up by system administrators.
-
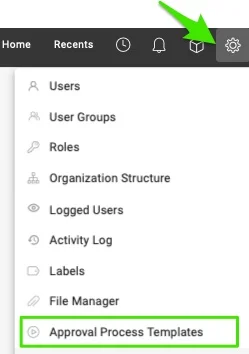
Open the approval templates. Go to Settings in the upper right corner and select Approval Process Templates.
-
Create a new template. Click the + Create New button.
-
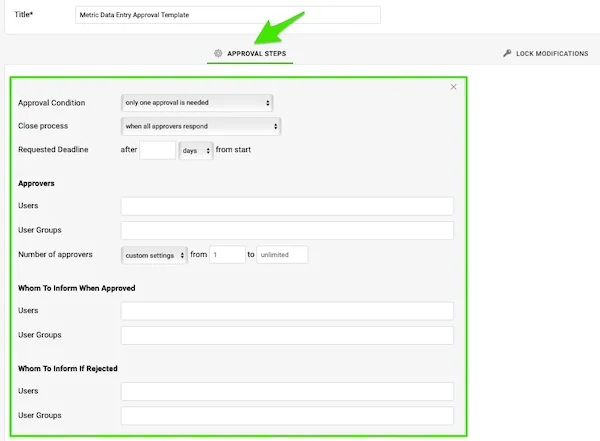
Define the approval steps. Enter the title of your template and define your approval steps. Specifying the approvers is optional.
-
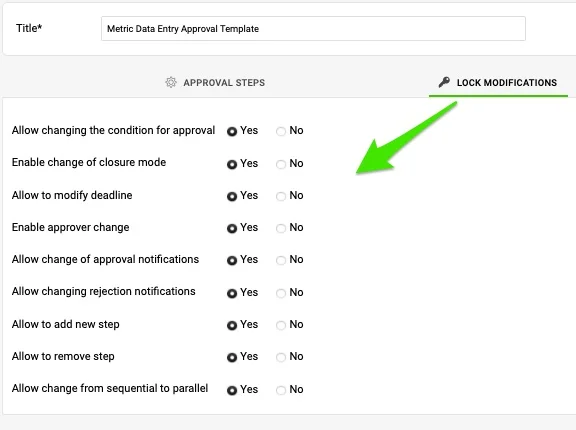
Define the lock. Set up your Lock Modifications.
Part 3 – Enable approval in the metric settings
-
Open the metrics list. In the left panel, select Metrics from the submenu of the Metric Dashboards module.
-
Edit the metric. Click the edit pencil next to your metric.

-
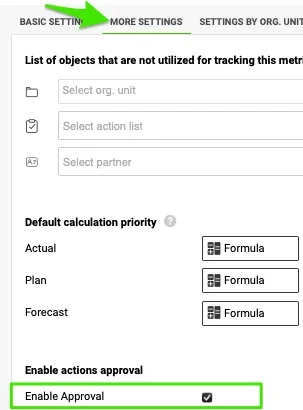
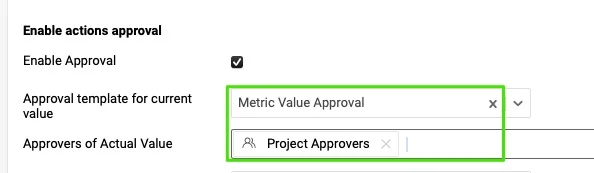
Enable approval. On the More Settings tab, tick the Enable Approval box.
-
Select the template and approvers. Select the approval template and your approvers for the actual, plan and/or forecast values.
Part 4 – Follow the approval process for your data entry
Submit values for approval
The person responsible for data entry follows these steps:
-
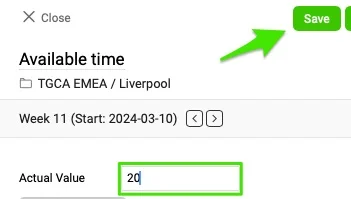
Enter and save the value. Enter your metric value and click the Save button.
-
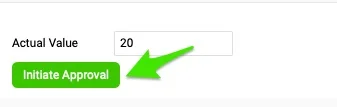
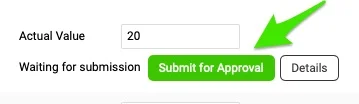
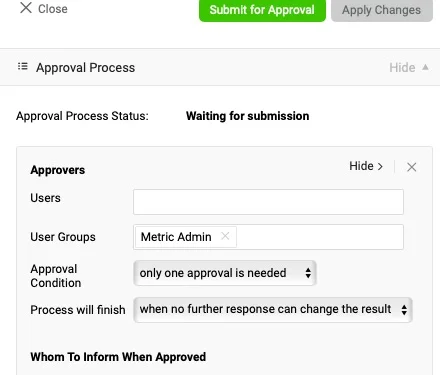
Submit the value for approval. Click Initiate Approval and then Submit for Approval.
-
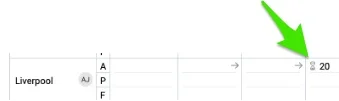
Check the approval status. In the Details section, you can see how the approval process is set up. Once you submit your request, an hourglass icon is displayed next to your value.
Approve or reject from the email
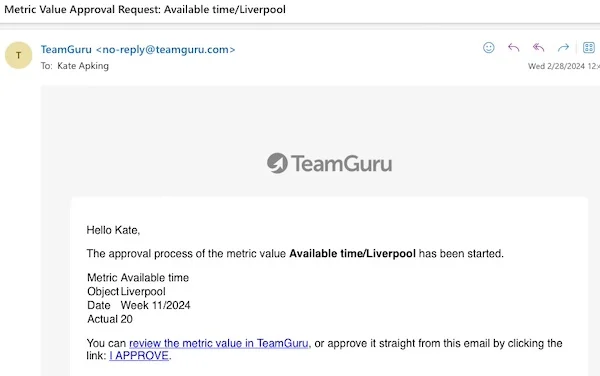
After a value is submitted for approval, the approver receives an email notification. You can either click the I APPROVE link directly or go to the document.
Explain a rejection in the comments
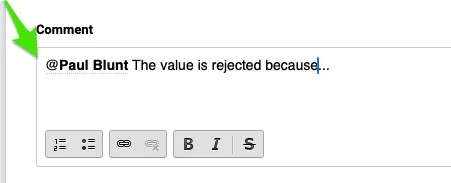
If you reject the value, use the @mention feature in the comments section to give the responsible person more details.
Filter metrics by approval
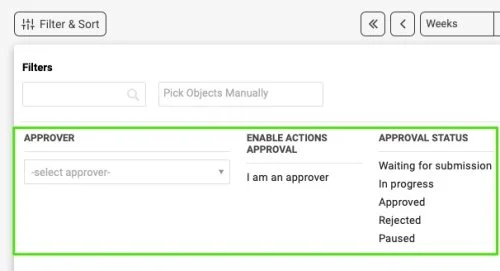
Filter and sort the metrics by those requiring your approval or by their approval status.
Find approvals on My Dashboard
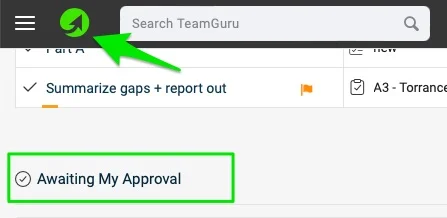
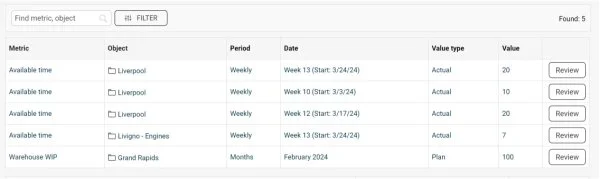
The approver also sees all metrics awaiting approval on the My Dashboard page, in the Awaiting My Approval section.
设置审批流程,确保指标数据准确可靠。审批步骤可确保数据符合您的标准,减少错误,并让团队更高效地维护数据完整性。
审批流程包括四个部分:
- 第1部分 – 为审批人和指定的“通知对象”用户建立用户组(此部分并非总是需要*)
- 第2部分 – 创建审批模板
- 第3部分 – 在指标设置中启用审批
- 第4部分 – 按审批流程录入数据
此操作需要相应权限。以下大部分任务通常由系统管理员设置。如果您没有足够的权限,请联系管理员协助。
*如果审批模板针对的是每次都联系同一批人员的特定审批流程,可以直接在模板中选择这些人员。也可以将该字段留空,按照第3部分“在指标设置中启用审批”中的说明,为每个指标分别选择不同的人员或用户组。
第1部分 – 为审批人和“通知对象”用户建立用户组
-
创建用户组。 进入设置,选择用户组,然后点击 + 新建按钮。
-
定义用户组。 设置用户组;您可以按特定地点对成员进行分组。
第2部分 – 创建审批模板
审批模板通常由系统管理员设置。
-
打开审批模板。 点击右上角的设置,选择审批流程模板。
-
新建模板。 点击 + 新建按钮。
-
定义审批步骤。 输入模板标题并定义审批步骤。指定审批人为可选项。
-
定义锁定。 设置锁定修改。
第3部分 – 在指标设置中启用审批
-
打开指标列表。 在左侧面板中,从指标仪表板模块的子菜单中选择指标。
-
编辑指标。 点击指标旁边的编辑铅笔图标。
-
启用审批。 在更多设置选项卡上,勾选启用审批复选框。
-
选择模板和审批人。 为实际值、计划值和/或预测值选择审批模板和审批人。
第4部分 – 按审批流程录入数据
提交数值以供审批
负责数据录入的人员按以下步骤操作:
-
输入并保存数值。 输入指标数值,然后点击保存按钮。
-
提交数值以供审批。 点击发起审批,然后点击提交审批。
-
查看审批状态。 在详细信息部分,可以看到审批流程的设置情况。提交请求后,数值旁边会显示沙漏图标。
通过电子邮件批准或拒绝
数值提交审批后,审批人会收到电子邮件通知。您可以直接点击我批准链接,也可以进入文档进行处理。
在评论中说明拒绝原因
如果拒绝该数值,请在评论区使用@提及功能,向负责人说明详细情况。
按审批筛选指标
按需要您审批的指标或按审批状态筛选和排序指标。
在我的仪表板中查找审批
审批人还可以在我的仪表板页面的等待我审批部分看到所有等待审批的指标。
还需要帮助吗?
请给我们留言。工作日我们通常会在一小时内回复。