How to mass upload actions
If you have an action list document in XLS format, you can mass upload its actions into TeamGuru.
Prepare the file
-
Prepare the action list. Prepare the action list you want to upload.
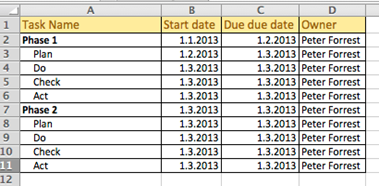
-
Indicate parent tasks. When uploading a subtask structure, indicate the parent task of each action.
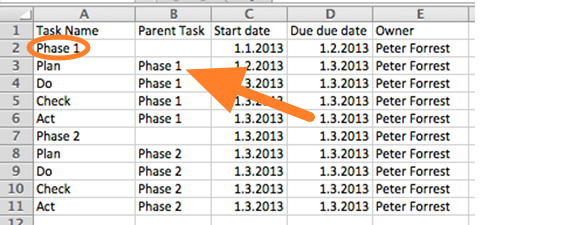
-
Use an accepted date format. Accepted date formats are D.M.YYYY or YYYY-M-D (e.g. 1.3.2013 for March 1st, 2013).
You can upload the file in two ways: A) using the clipboard, or B) using a predefined template.
A) Upload the actions using the clipboard
-
Copy the data. Select the data in your prepared XLS file and copy it (Ctrl+C).
-
Open the mass import. Go to the action list and click the Mass Import icon.
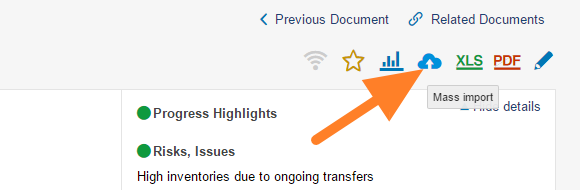
-
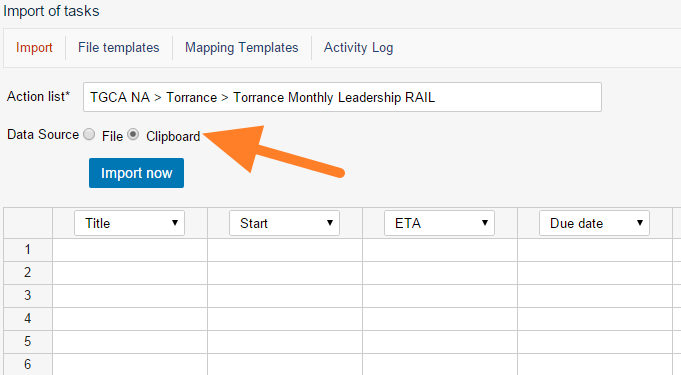
Choose the clipboard. As the Data Source, select Clipboard.
-
Paste the actions. Click into the first cell and paste the actions (Ctrl+V).
-
Set the column order. Set up the order of the columns by changing the column headers as needed.
-
Import the actions. Click the Import now button.
B) Upload the file using a predefined template
-
Save the file as CSV. In Excel, click Save As and select the CSV file format.
-
Open the mass import. Go to the action list and click the Mass Import icon.
-
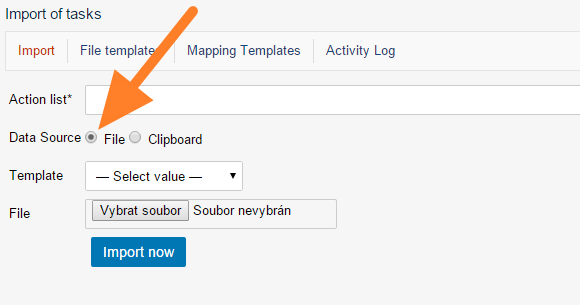
Choose a file. As the Data Source, select File.
-
Select the template. Select a predefined template (see how to create a file template).
-
Upload the file. Upload your CSV file.
-
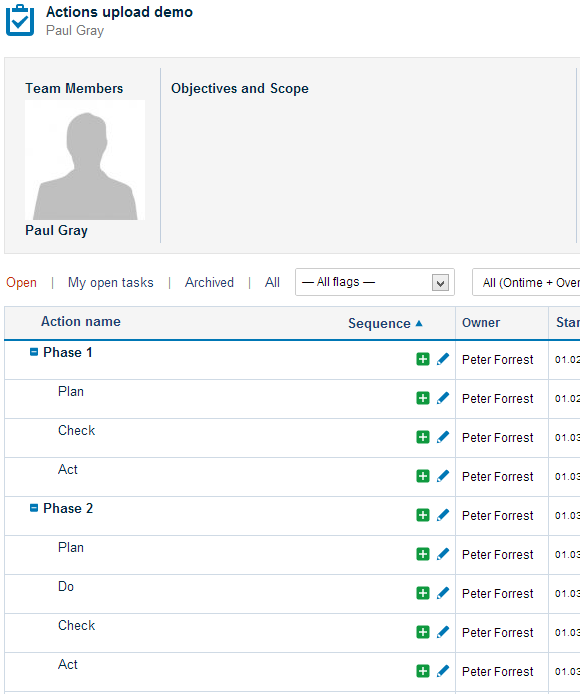
Check the results. Go to your TeamGuru action list to check the upload results.
Still need help?
Write to us. We usually reply within an hour on business days.