Jak zobrazit vlastní pole v záhlaví akčního listu
Strojový překlad z angličtiny. Zobrazen anglický originál.
Your TeamGuru administrator can create custom fields in the system, and you can choose whether to display them in your action list header.
Open the action list in edit mode
To display custom fields, go to your action list and enter edit mode.
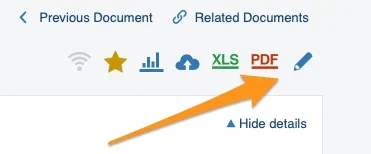
Find the custom fields
Go to the Project Definition tab and scroll down to the custom field box.
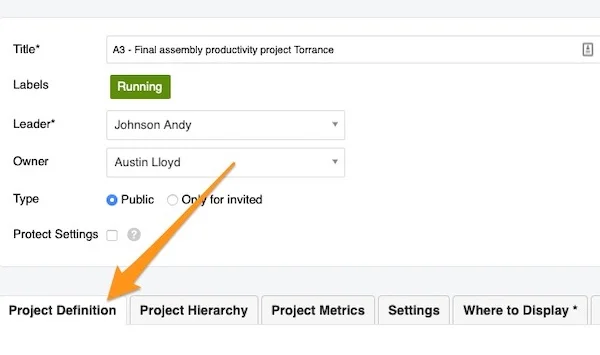
Fill in the custom fields
Tick the box to display the custom fields and enter the information needed.
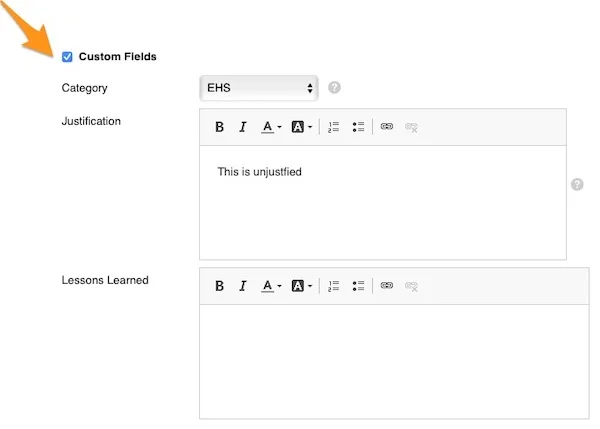
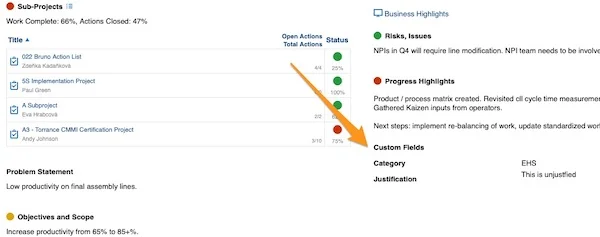
Check the header
Please note that a custom field is displayed in the action list header only when it is filled in and the option is selected. If a custom field is left blank or no option is selected, its title does not appear in the header (e.g., the Lessons Learned field in the screenshot above).
Please contact your system administrator or support@teamguru.com if you need a new custom field to be created.
Administrátor TeamGuru může v systému vytvořit vlastní pole a vy si zvolíte, zda se mají zobrazovat v záhlaví vašeho akčního listu.
Otevření akčního listu v režimu úprav
Chcete-li zobrazit vlastní pole, otevřete akční list v režimu úprav.
Vyhledání vlastních polí
Přejděte na kartu Definice projektu a sjeďte dolů k rámečku s vlastními poli.
Vyplnění vlastních polí
Zaškrtněte políčko pro zobrazení vlastních polí a doplňte potřebné údaje.
Kontrola záhlaví
Vlastní pole se v záhlaví akčního listu zobrazí, jen když je vyplněné a volba je zaškrtnutá. Pokud vlastní pole zůstane prázdné nebo volba není zaškrtnutá, jeho název se v záhlaví neobjeví (např. pole Lessons Learned na snímku obrazovky výše).
Pokud potřebujete vytvořit nové vlastní pole, obraťte se na administrátora systému nebo na support@teamguru.com.
Potřebujete další pomoc?
Napište nám. V pracovní dny obvykle odpovídáme do hodiny.