So aktualisieren Sie mehrere Projektköpfe
Maschinelle Übersetzung aus dem Englischen. Englisches Original wird angezeigt.
You can update specific field information in multiple project headers at once.
Please note that this functionality lets you update information in your projects, but not remove it.
Prepare the mapping
Open the mass import
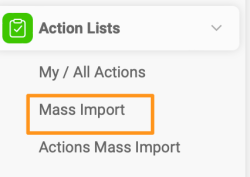
Go to the Action Lists module and select Mass Import from the submenu.
Create a mapping template
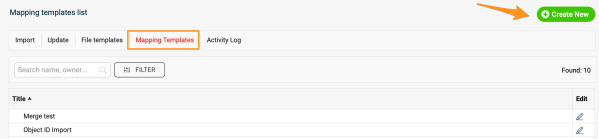
Before the upload, you need to map your project stages, project types and organizational units (to determine the Where to display locations), unless you already have a mapping template from previous mass imports. Go to Mapping Template, click Create New, define the title and click Save.
Map the values
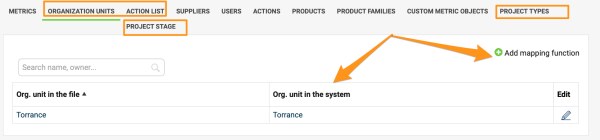
Map the organization units, project types and project stages: click the Add mapping function plus button and save the changes. Please note that if you upload by project title instead of project ID, you also need to map the action list titles.
Update the project headers
Select the mapping template
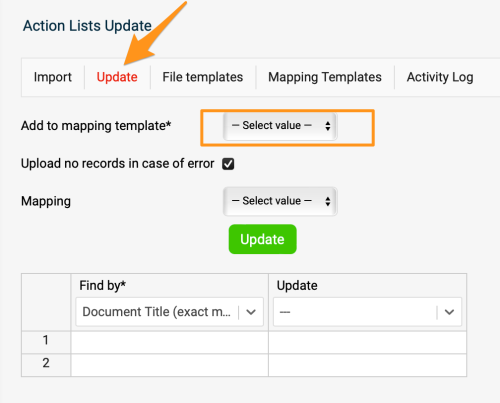
Once the mapping is done, go to the Update tab and select your mapping template from the submenu.
Choose how to find the projects
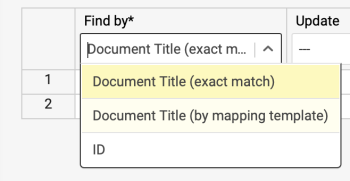
In the first column, select the Find by option: you can use either the document’s title or its ID. We highly recommend the ID option in case two projects in the system have the same name, or a project’s title changes before future updates.
Select the fields to update
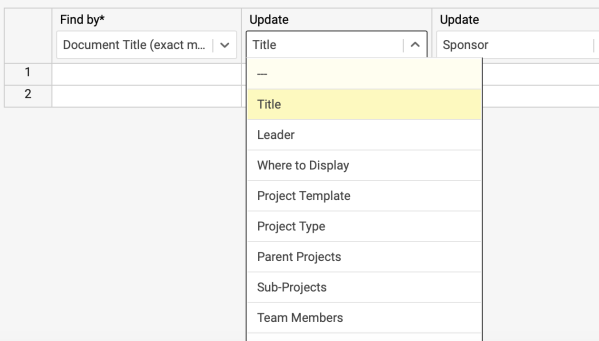
Select the information you want to update in the other columns.
Fill in the rows
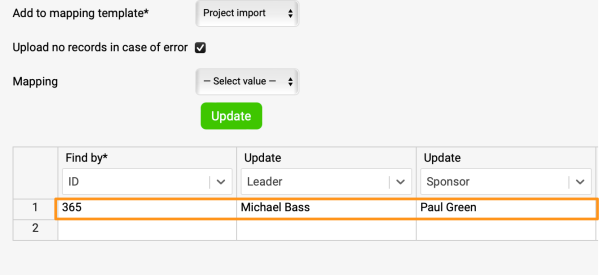
Complete the information in the rows.
Run the update
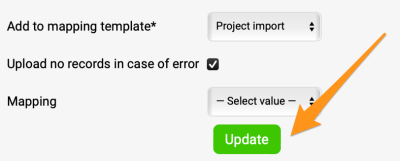
Click Update, and your project information is updated.
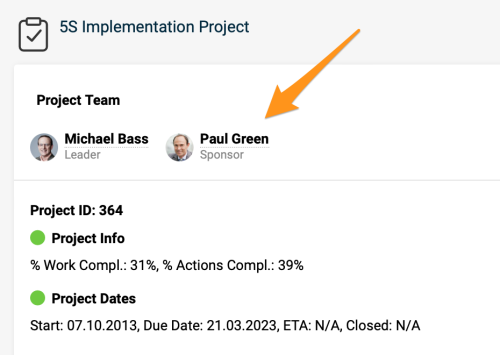
Sie können bestimmte Felder in mehreren Projektköpfen gleichzeitig aktualisieren.
Mit dieser Funktion können Sie Angaben in Ihren Projekten aktualisieren, aber nicht entfernen.
Zuordnung vorbereiten
Massenimport öffnen
Öffnen Sie das Modul Maßnahmenlisten und wählen Sie im Untermenü Massenimport.
Zuordnungsvorlage erstellen
Vor dem Upload müssen Sie Projektstufen, Projekttypen und Organisationseinheiten zuordnen (daraus ergibt sich, wo die Projekte angezeigt werden), sofern Sie nicht schon eine Zuordnungsvorlage aus früheren Massenimporten haben. Öffnen Sie Zuordnungsvorlage, klicken Sie auf Neu erstellen, geben Sie einen Titel ein und klicken Sie auf Speichern.
Werte zuordnen
Ordnen Sie Organisationseinheiten, Projekttypen und Projektstufen zu: Klicken Sie auf die Plus-Schaltfläche Zuordnung hinzufügen und speichern Sie die Änderungen. Wenn Sie nach Projekttitel statt nach Projekt-ID hochladen, müssen Sie auch die Titel der Maßnahmenlisten zuordnen.
Projektköpfe aktualisieren
Zuordnungsvorlage auswählen
Wenn die Zuordnung fertig ist, wechseln Sie zur Registerkarte Aktualisieren und wählen Sie im Untermenü Ihre Zuordnungsvorlage.
Festlegen, wie Projekte gefunden werden
Wählen Sie in der ersten Spalte die Option Suchen nach: Sie können entweder den Titel des Dokuments oder seine ID verwenden. Wir empfehlen dringend die ID, falls zwei Projekte im System denselben Namen haben oder sich der Titel eines Projekts vor künftigen Aktualisierungen ändert.
Zu aktualisierende Felder auswählen
Wählen Sie in den weiteren Spalten die Angaben, die Sie aktualisieren möchten.
Zeilen ausfüllen
Füllen Sie die Angaben in den Zeilen aus.
Aktualisierung ausführen
Klicken Sie auf Aktualisieren, und Ihre Projektangaben werden aktualisiert.
Brauchen Sie weitere Hilfe?
Schreiben Sie uns. An Werktagen antworten wir meist innerhalb einer Stunde.