Cómo actualizar varios encabezados de proyecto
Traducción automática del inglés. Se muestra el original en inglés.
You can update specific field information in multiple project headers at once.
Please note that this functionality lets you update information in your projects, but not remove it.
Prepare the mapping
Open the mass import
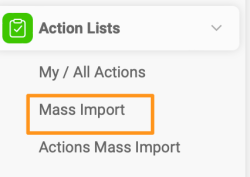
Go to the Action Lists module and select Mass Import from the submenu.
Create a mapping template
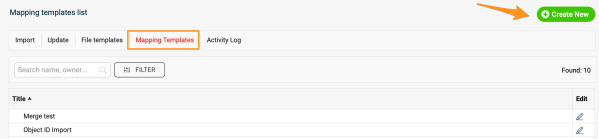
Before the upload, you need to map your project stages, project types and organizational units (to determine the Where to display locations), unless you already have a mapping template from previous mass imports. Go to Mapping Template, click Create New, define the title and click Save.
Map the values
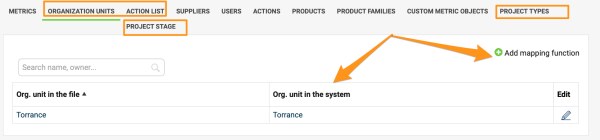
Map the organization units, project types and project stages: click the Add mapping function plus button and save the changes. Please note that if you upload by project title instead of project ID, you also need to map the action list titles.
Update the project headers
Select the mapping template
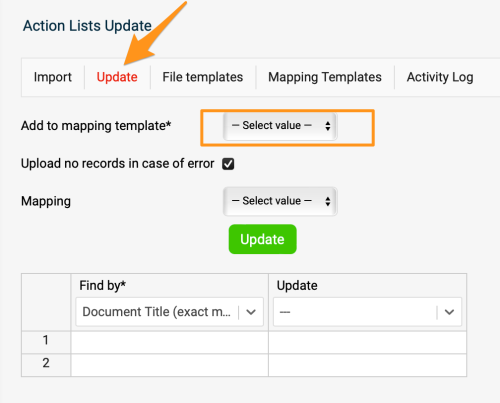
Once the mapping is done, go to the Update tab and select your mapping template from the submenu.
Choose how to find the projects
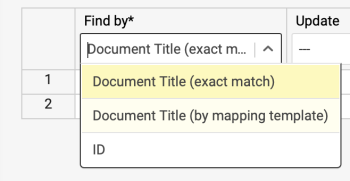
In the first column, select the Find by option: you can use either the document’s title or its ID. We highly recommend the ID option in case two projects in the system have the same name, or a project’s title changes before future updates.
Select the fields to update
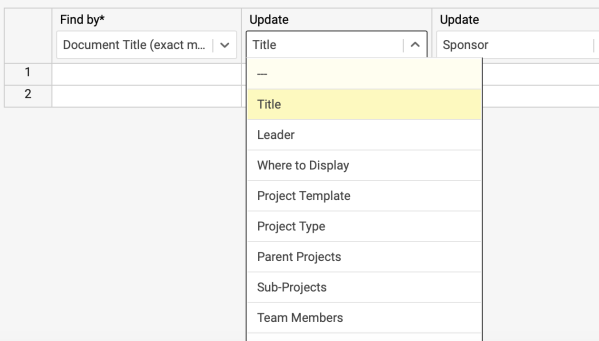
Select the information you want to update in the other columns.
Fill in the rows
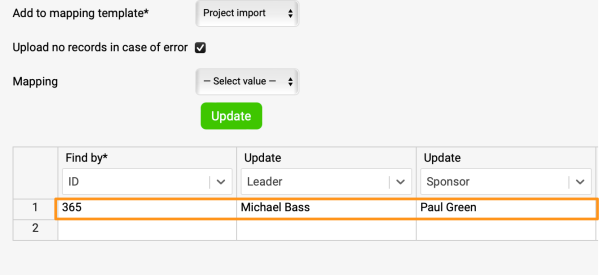
Complete the information in the rows.
Run the update
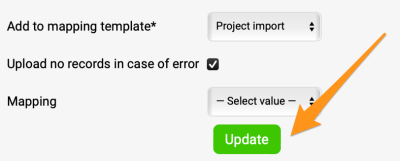
Click Update, and your project information is updated.
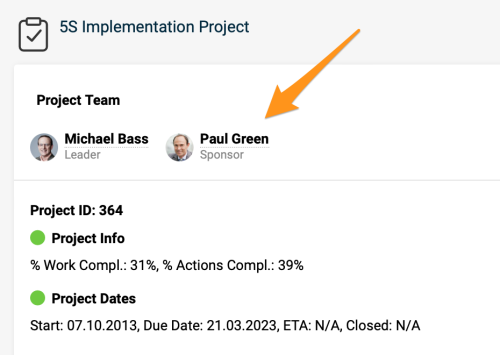
Puede actualizar la información de campos concretos en varios encabezados de proyecto a la vez.
Tenga en cuenta que esta función permite actualizar la información de sus proyectos, pero no eliminarla.
Preparar la asignación
Abrir la importación masiva
Vaya al módulo Planes de acción y seleccione Importación masiva en el submenú.
Crear una plantilla de asignación
Antes de la carga, debe asignar las etapas de proyecto, los tipos de proyecto y las unidades organizativas (para determinar las ubicaciones de Dónde mostrar), salvo que ya tenga una plantilla de asignación de importaciones masivas anteriores. Vaya a Plantilla de asignación, haga clic en Crear nuevo, defina el título y haga clic en Guardar.
Asignar los valores
Asigne las unidades organizativas, los tipos de proyecto y las etapas de proyecto: haga clic en el botón con el signo más Agregar función de asignación y guarde los cambios. Tenga en cuenta que, si carga los datos por título de proyecto en lugar de por ID de proyecto, también debe asignar los títulos de los planes de acción.
Actualizar los encabezados de proyecto
Seleccionar la plantilla de asignación
Una vez hecha la asignación, vaya a la pestaña Actualizar y seleccione su plantilla de asignación en el submenú.
Elegir cómo encontrar los proyectos
En la primera columna, seleccione la opción Buscar por: puede usar el título del documento o su ID. Le recomendamos encarecidamente la opción del ID, por si dos proyectos del sistema tienen el mismo nombre o si el título de un proyecto cambia antes de futuras actualizaciones.
Seleccionar los campos que se actualizan
Seleccione en las demás columnas la información que quiere actualizar.
Completar las filas
Complete la información en las filas.
Ejecutar la actualización
Haga clic en Actualizar y la información de sus proyectos se actualiza.
¿Necesita más ayuda?
Escríbanos. En días laborables solemos responder en menos de una hora.