Jak skonfigurować szablon RCCA
Tłumaczenie maszynowe z angielskiego. Wyświetlany jest oryginał po angielsku.
Standardize your RCCA documents across your company with a template. You can modify the system’s default template or create and customize your own. Sufficient rights are required.
Create the template
Open the template list
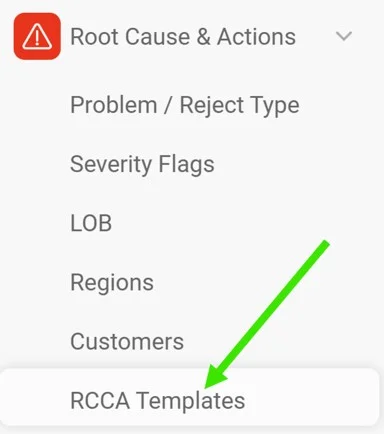
In the Root Cause & Actions module, select RCCA Templates from the submenu.
Create or edit a template
Click the green Create New icon in the upper right corner to create a new template. To modify an existing template, click its edit pencil.


Define the template settings
Fill in the title, the responsible person and the other settings.
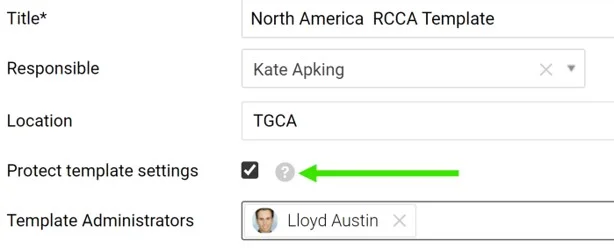
Location can be set for each template: the template then becomes the default one for that structure. Tick Protect template settings to lock the template, so that only the responsible person and the Template administrators can modify it.
Adjust the sections
Show, hide or make sections optional
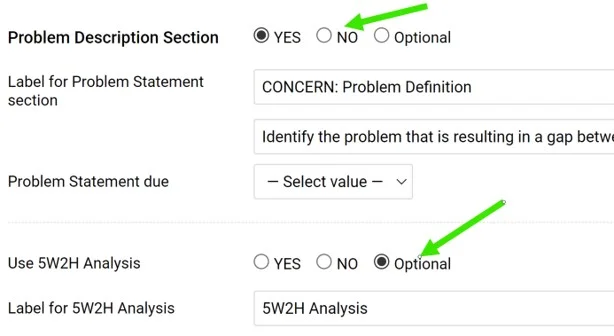
Choose which sections to display or hide, or set them to Optional, so that each RCCA document decides whether to use them.
Rename the section titles
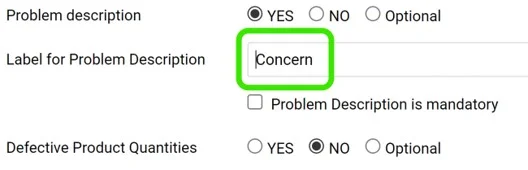
Rename the titles as needed.
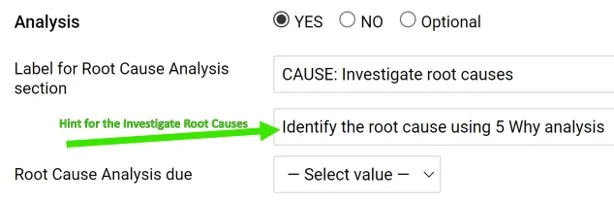
Add hints
Help your team understand what a field is intended for by entering a hint.
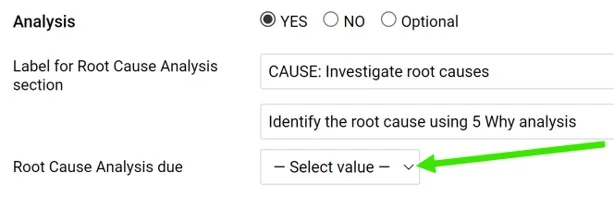
Require a due date
Select the due date if a section requires one (it is optional).
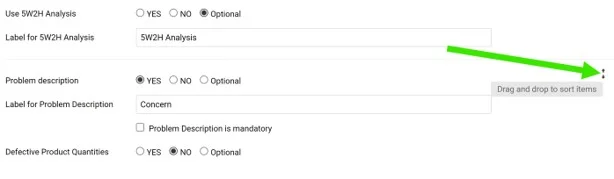
Reorder the sections
Change the order of the sections by drag and drop: the handle appears when you hover over the right side of a section.
Save the template
Click the green Save & Return icon in the upper right corner.
Use the template
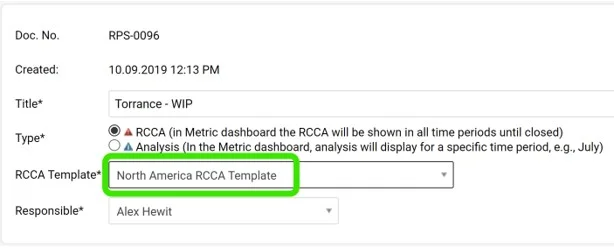
Pick the template for a new RCCA
When you create an RCCA document, you are prompted to select a template.
Filter documents by template
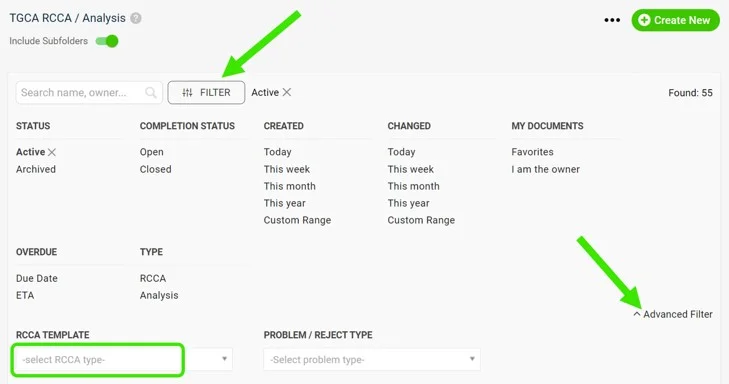
Use the advanced filter in your document list to see the documents based on a specific template.
Text entered in a field of an RCCA document is kept when you switch to another template, even if that template names the field differently. If the field is not activated in the new template, its text is hidden, and it appears again once the field is activated.
Please contact us if you need any assistance. We are ready to help.
Ujednolić dokumenty RCCA w całej firmie za pomocą szablonu. Możesz zmienić domyślny szablon systemu albo utworzyć i dostosować własny. Potrzebujesz do tego odpowiednich uprawnień.
Utwórz szablon
Otwórz listę szablonów
W module Analiza przyczyn i działania korygujące wybierz z podmenu Szablony RCCA.
Utwórz lub edytuj szablon
Aby utworzyć nowy szablon, kliknij zieloną ikonę Utwórz nowy w prawym górnym rogu. Aby zmienić istniejący szablon, kliknij jego ikonę ołówka.
Określ ustawienia szablonu
Wpisz tytuł, wybierz osobę odpowiedzialną i uzupełnij pozostałe ustawienia.
Każdemu szablonowi możesz przypisać Lokalizację: szablon staje się wtedy domyślnym szablonem dla tej części struktury. Zaznacz Chroń ustawienia szablonu, aby zablokować szablon. Zmieniać go będą mogli tylko osoba odpowiedzialna i Administratorzy szablonu.
Dostosuj sekcje
Pokaż, ukryj lub ustaw sekcje jako opcjonalne
Wybierz, które sekcje mają być widoczne, a które ukryte, albo ustaw je jako Opcjonalne. Wtedy w każdym dokumencie RCCA zdecydujesz, czy z nich korzystać.
Zmień tytuły sekcji
W razie potrzeby zmień tytuły sekcji.
Dodaj podpowiedzi
Wpisz podpowiedź, aby zespół wiedział, do czego służy dane pole.
Wymagaj terminu
Jeśli sekcja wymaga terminu, zaznacz termin (to opcjonalne).
Zmień kolejność sekcji
Zmień kolejność sekcji metodą „przeciągnij i upuść”: uchwyt pojawi się, gdy najedziesz kursorem na prawą stronę sekcji.
Zapisz szablon
Kliknij zieloną ikonę Zapisz i wróć w prawym górnym rogu.
Używaj szablonu
Wybierz szablon dla nowego dokumentu RCCA
Podczas tworzenia dokumentu RCCA system poprosi cię o wybranie szablonu.
Filtruj dokumenty według szablonu
W filtrze zaawansowanym na liście dokumentów możesz wyświetlić dokumenty oparte na wybranym szablonie.
Tekst wpisany w polu dokumentu RCCA zostaje zachowany po przełączeniu na inny szablon, nawet jeśli w tym szablonie pole ma inną nazwę. Jeśli pole nie jest włączone w nowym szablonie, jego tekst jest ukryty i pojawi się ponownie po włączeniu pola.
Jeśli potrzebujesz pomocy, skontaktuj się z nami. Chętnie pomożemy.
Potrzebujesz dalszej pomocy?
Napisz do nas. W dni robocze zwykle odpowiadamy w ciągu godziny.