How to create a new metric - Basic Settings
Creating a metric in the system requires sufficient access. To keep metrics standardized across your company, agree internally on the name of each metric and its purpose. This ensures that everyone understands and uses the correct metrics.
We recommend contacting your system administrator when you need to create a new metric.
Create a new metric
-
Open the metric list. Go to Metric Dashboards and select Metrics in the submenu.
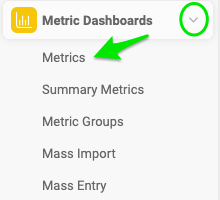
-
Add a new metric. Click the Add icon to add a new metric.
-
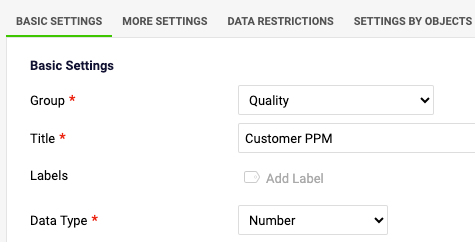
Fill in the basic settings. Fill in the metric definition in the Basic Settings section, as described below.
Basic settings of a metric
Select the group and title
Select the metric Group and fill in the Title of the metric. The title is visible in your dashboards.
Add labels
You can add metric Labels: use an existing label or create a new one. The metric label is displayed in all dashboards where the metric is used. You can also select for which part of the organization the label is used.
Select the data type
Select the Data Type: Number, Percentage, Date, Yes/No metric, or Text metric.
Set the units
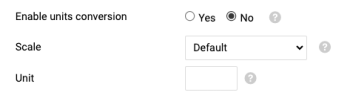
- Choose Yes if you want to enable units conversion.
- Choose a Scale (for thousands, millions, etc.) if needed.
- Fill in the measurement Unit (a symbol or abbreviation, e.g. $, €, USD).
Protect the metric
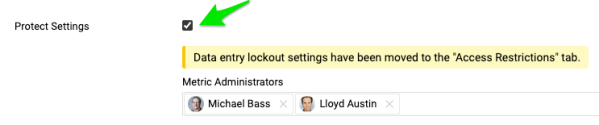
Protect Metric: if you tick this box, only the selected metric administrators can edit the metric’s settings.
Set the valid range of values
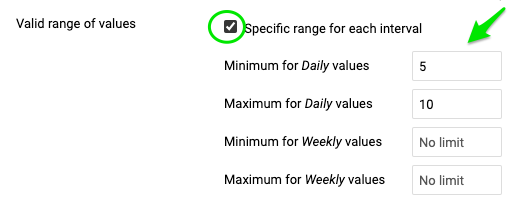
Valid range of values: define the minimum and maximum value for each time period, so that users cannot enter lower or higher values than defined.
Set the background color
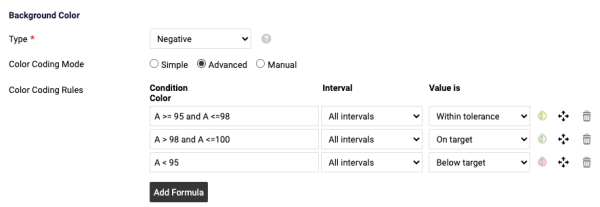
- Background Color: the metric type can be negative, positive or exact value.
- With the Simple color coding mode, you specify whether the values are compared to the Plan or to the Forecast values. If the priority is set to Forecast but you enter only Plan values, the values are automatically compared to the Plan values.
- With the Advanced color coding mode, you can customize the metric color coding according to the conditions you define.
Besides the metric’s basic settings, you can also set up additional rules on the other tabs.
Video guide: How to create a new metric
Related video guides: Enable Unit Conversion, Metric’s Definition & Related documents
Still need help?
Write to us. We usually reply within an hour on business days.