行动清单中的项目分期
本文由英文机器翻译。 当前显示英文原文。
Dividing a project into clear phases makes even complex tasks feel manageable and creates an efficient workflow. Each phase is a stepping stone that guides you from planning to completion with focused, organized steps.
Please note that project phases differ from project stages: phases refer to specific actions within your project, while stages represent milestones at the project level.
To use project phases in your project, they must first be created in the system. This requires sufficient rights, so please contact your system administrator if you need new phases added.
Create a project phase
-
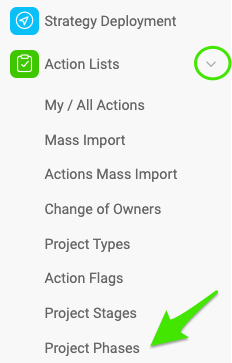
Open the project phases. Go to the Action Lists module, click the submenu arrow and select Project Phases.
-
Create a new list. Click the Create New button.

-
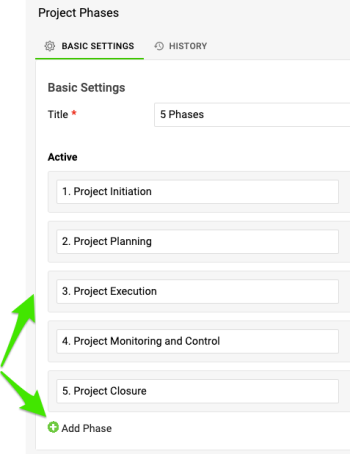
Add the phases. Enter a title for your list of project phases, then click Add Phase for each phase you want to include.
Set up project phases in your action list
-
Open the action list in edit mode. Open the action list document in edit mode.

-
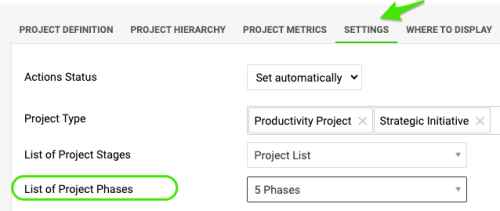
Select the phase list. Go to the Settings tab and select the List of Project Phases from the submenu.
-
Save the settings. Click Save & View to go to view mode.

-
Add or open an action. In the actions section, click Add Action or click an existing action.

-
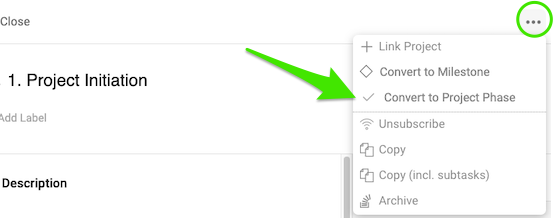
Convert the action to a phase. Click the ellipsis next to the action and select Convert to Project Phase.
-
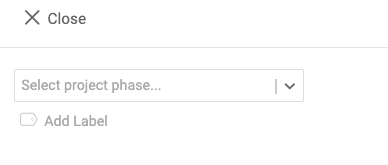
Choose the phase. Choose the phase you want. The action is highlighted to visually indicate the phase.

-
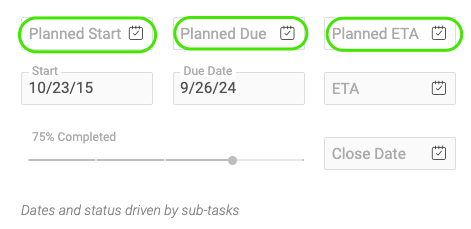
Set the phase dates. You can set a plan start date and due date for the phase that differ from the start and due dates of its sub-actions. This lets you manage the timeline of the phase separately.
-
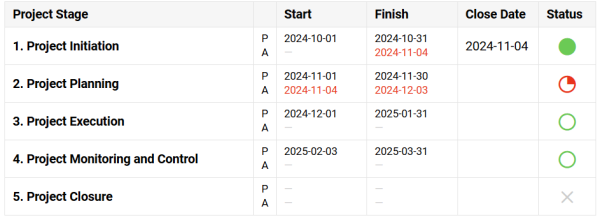
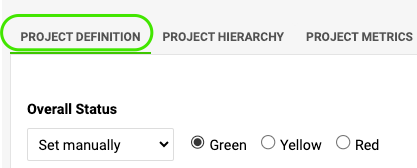
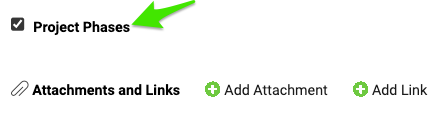
Show the phase summary in the header. To display the phase summary in the action list header, go back to edit mode. On the Project Definition tab, scroll down and make sure the Project Phases field is enabled.
-
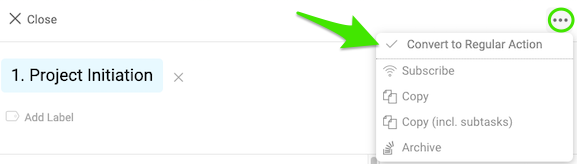
Convert a phase back if needed. To convert a phase back to a regular action, select the action, click the ellipsis and choose Convert to Regular Action.
-
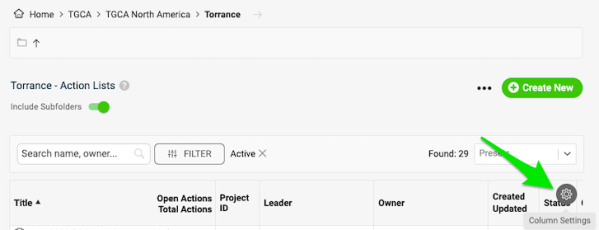
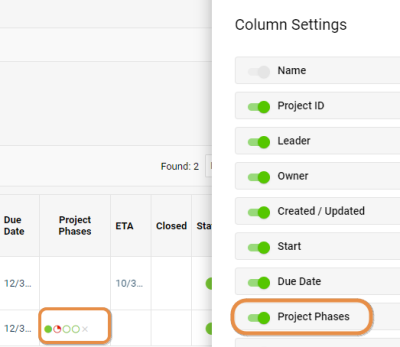
Show phases in the document list. You can also display the status of your phases in the document list: hover over the upper right corner, click the settings gear and enable the Project Phases option.
将项目划分为清晰的分期,即使是复杂的任务也会变得易于管理,工作流程也更加高效。每个分期都是一个台阶,通过有重点、有条理的步骤,引导您从规划走向完成。
请注意,项目分期与项目阶段不同:分期指项目中的具体行动,而阶段代表项目层面的里程碑。
要在项目中使用项目分期,必须先在系统中创建。此操作需要相应权限,如需添加新的分期,请联系系统管理员。
创建项目分期
-
打开项目分期。 进入行动清单模块,点击子菜单箭头,选择项目分期。
-
新建列表。 点击新建按钮。
-
添加分期。 输入项目分期列表的标题,然后为每个要包含的分期点击添加分期。
在行动清单中设置项目分期
-
以编辑模式打开行动清单。 以编辑模式打开行动清单文档。
-
选择分期列表。 进入设置选项卡,在子菜单中选择项目分期列表。
-
保存设置。 点击保存并查看,进入查看模式。
-
添加或打开行动。 在行动部分点击添加行动,或点击现有行动。
-
将行动转换为分期。 点击行动旁边的省略号,选择转换为项目分期。
-
选择分期。 选择所需的分期。该行动会突出显示,直观地标示出分期。
-
设置分期日期。 您可以为分期设置与其子行动不同的计划开始日期和截止日期,从而单独管理分期的时间线。
-
在表头中显示分期摘要。 要在行动清单表头中显示分期摘要,请返回编辑模式。在项目定义选项卡上向下滚动,确保已启用项目分期字段。
-
按需将分期转换回来。 要将分期转换回普通行动,请选中该行动,点击省略号,然后选择转换为普通行动。
-
在文档列表中显示分期。 您还可以在文档列表中显示各分期的状态:将鼠标悬停在右上角,点击设置齿轮图标,启用项目分期选项。
还需要帮助吗?
请给我们留言。工作日我们通常会在一小时内回复。