Como criar um novo dashboard
Tradução automática do inglês. Exibindo o original em inglês.
Use metric dashboards to track your metrics (KPIs) for different parts of your organization (e.g. sites), for partners (suppliers or customers) or for projects.
Create the dashboard
-
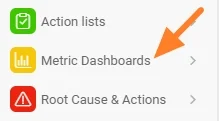
Open the module. Click the Metric Dashboards module.
-
Create a new dashboard. Click the Create New icon.
-
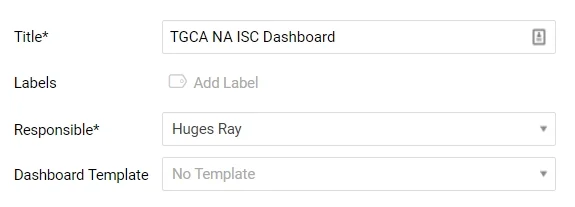
Fill in the main information. Complete the main information, such as Title, Responsible, etc.
-
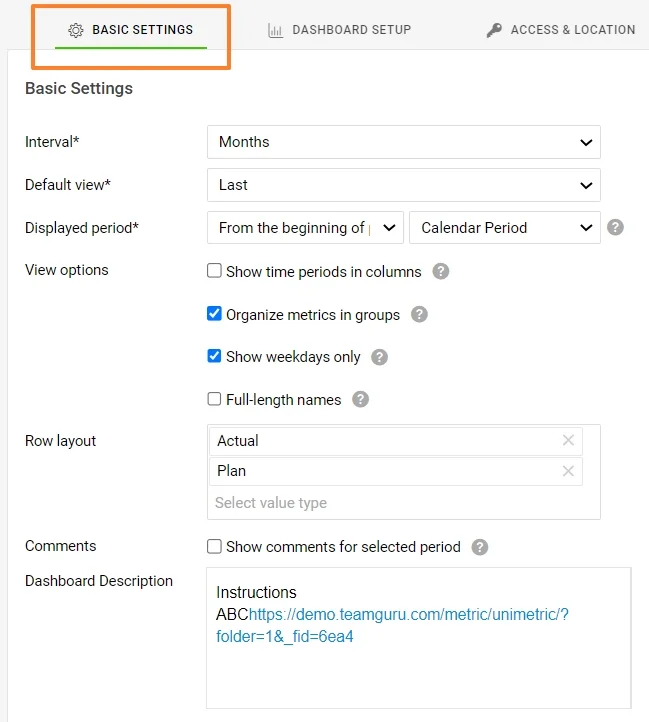
Define the basic settings. Define the default information on the Basic Settings tab, such as the interval, the default view, etc.
-
Save the basic data. When the basic data is filled in, click the Save button.
Add org. units, metrics and responsible people
-
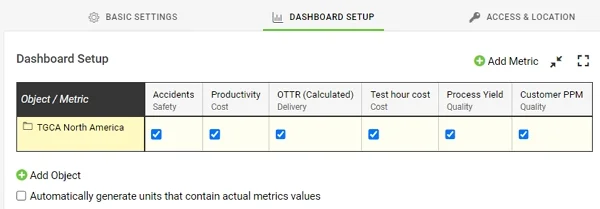
Add org. units and metrics. On the Dashboard Setup tab, choose your organization units and metrics by clicking the Add icons.
-
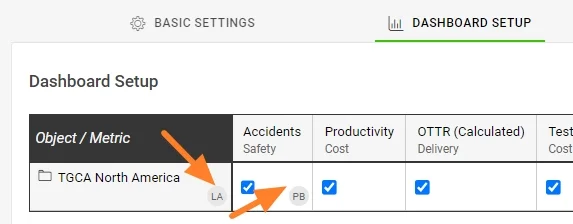
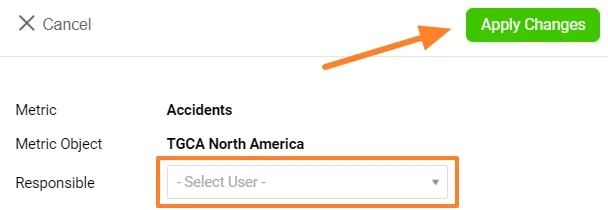
Add the responsible people. To add a Responsible person, click your org. unit (if they are responsible for the whole site), or click into the org. unit/metric cell (if they are responsible for a specific metric only). The responsible person’s initials are displayed next to it.
If the organization units are not set up in your TeamGuru yet, see How I manage the organization structure. If the metric you want to track is not defined in the system yet, see How to create a new metric. You need a sufficient role for this.
Set access and location
-
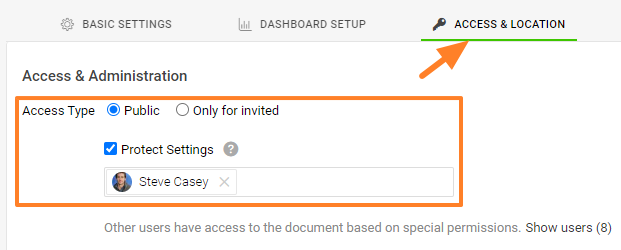
Choose the access type. Go to the Access & Location tab and select the Access Type: share your dashboard with everyone who has sufficient access, or only with invited people. If you choose Only for invited, select the invitees from the menu (they must be set up as active or passive users in the system). Passive users can only receive notifications, if any are set up.
Protect Settings: if you tick this box, only the responsible person and the selected document administrators can change the settings of this dashboard.
-
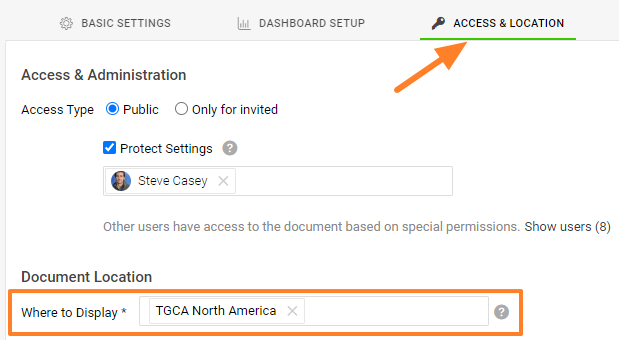
Set the document location. In Document Location, select where the new dashboard should be saved and displayed.
-
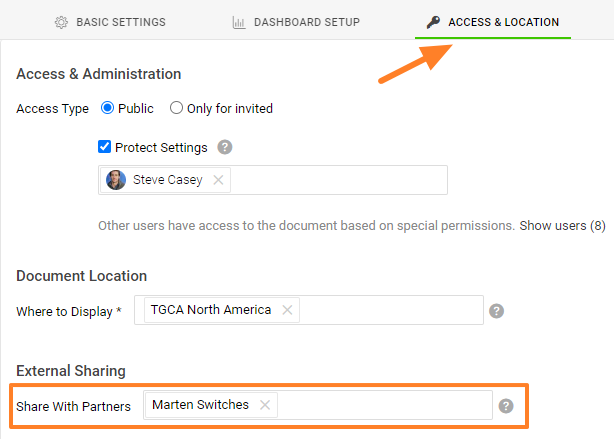
Share with external partners. You can share your document with External Partners: select the existing partners from the menu. If you need to create a new partner in the system, follow this link.
Connect documents and set up notifications
-
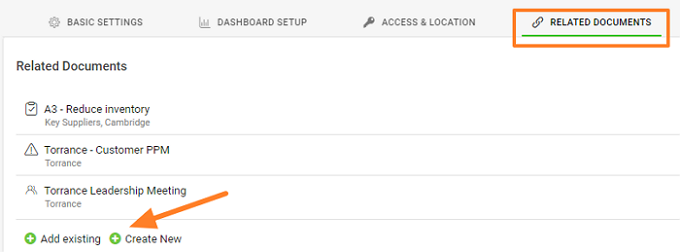
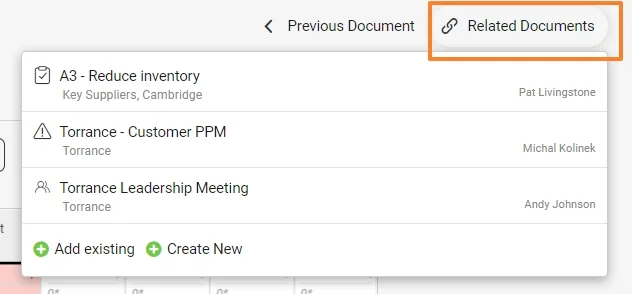
Set up related documents. Set up Related Documents on their tab. You then find these documents and their live links under the Related Documents button in the upper right corner above your document. You can also set up related documents directly from there.
-
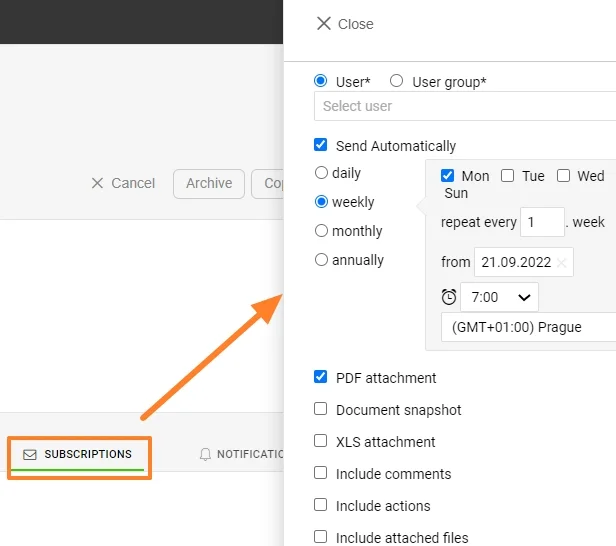
Set up subscriptions. Set up Subscriptions to receive notification emails.
-
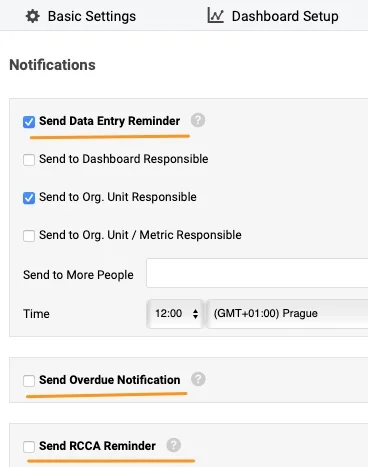
Set up notifications. Set up email Notifications to receive reminders.
Review and use the dashboard
-
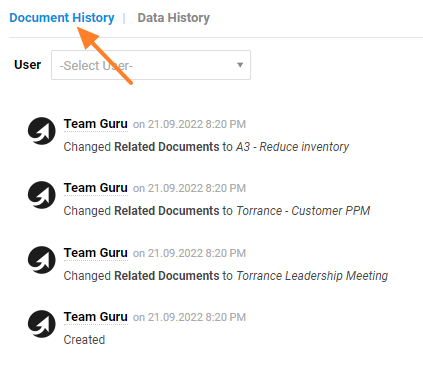
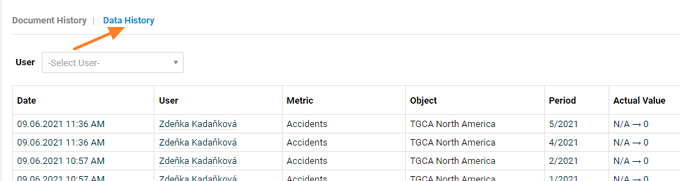
Check the history. Check the History log, where you can see the document history or the data history.

-
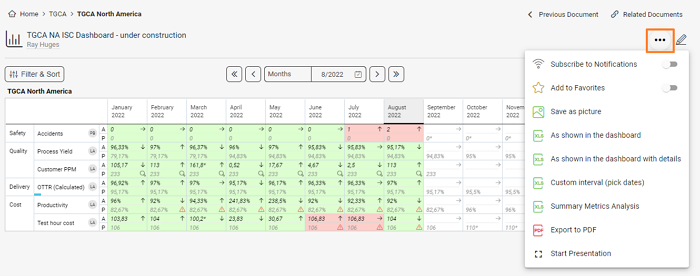
Use the additional features. View your dashboard and use the additional features: subscribe to your document or add it to Favorites, Save as picture, or export your dashboard to XLS or PDF in different ways. You can also start a presentation of your dashboard.
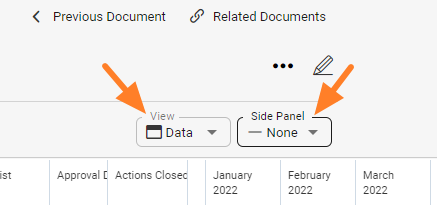
The view options let you see the dashboard as Data, Spreadsheet or Charts, and the Side Panel shows the Attachments, Actions and Comments used in the dashboard.
Video guide: Metric dashboards
Use os dashboards de KPI para acompanhar suas métricas (KPIs) em diferentes partes da organização (por exemplo, unidades), de parceiros (fornecedores ou clientes) ou de projetos.
Criar o dashboard
-
Abra o módulo. Clique no módulo Dashboards de KPI.
-
Crie um novo dashboard. Clique no ícone Criar novo.
-
Preencha as informações principais. Preencha as informações principais, como Título, Responsável etc.
-
Defina as configurações básicas. Na aba Configurações básicas, defina as informações padrão, como o intervalo, a visualização padrão etc.
-
Salve os dados básicos. Depois de preencher os dados básicos, clique no botão Salvar.
Adicionar unidades organizacionais, métricas e responsáveis
-
Adicione unidades organizacionais e métricas. Na aba Configuração do dashboard, escolha as unidades organizacionais e as métricas clicando nos ícones Adicionar.
-
Adicione os responsáveis. Para adicionar um Responsável, clique na unidade organizacional (se a pessoa for responsável pela unidade inteira) ou na célula da unidade/métrica (se for responsável apenas por uma métrica). As iniciais do responsável aparecem ao lado.
Se as unidades organizacionais ainda não estiverem configuradas no seu TeamGuru, veja Como gerenciar a estrutura organizacional. Se a métrica que você quer acompanhar ainda não estiver definida no sistema, veja Como criar uma nova métrica. Para isso, você precisa de uma função com permissões suficientes.
Definir acesso e local
-
Escolha o tipo de acesso. Abra a aba Acesso e local e selecione o Tipo de acesso: compartilhe o dashboard com todos que têm acesso suficiente ou apenas com convidados. Se escolher Somente convidados, selecione os convidados no menu (eles precisam estar cadastrados no sistema como usuários ativos ou passivos). Usuários passivos só recebem notificações, se houver alguma configurada.
Proteger configurações: se você marcar esta caixa, apenas o responsável e os administradores do documento selecionados poderão alterar as configurações deste dashboard.
-
Defina o local do documento. Em Local do documento, selecione onde o novo dashboard será salvo e exibido.
-
Compartilhe com parceiros externos. Você pode compartilhar o documento com Parceiros externos: selecione os parceiros existentes no menu. Se precisar cadastrar um novo parceiro no sistema, siga este link.
Vincular documentos e configurar notificações
-
Configure os documentos relacionados. Configure os Documentos relacionados na aba correspondente. Esses documentos e seus links ficam disponíveis no botão Documentos relacionados, no canto superior direito acima do documento. Você também pode configurá-los diretamente por ali.
-
Configure as assinaturas. Configure Assinaturas para receber e-mails de notificação.
-
Configure as notificações. Configure Notificações por e-mail para receber lembretes.
Revisar e usar o dashboard
-
Confira o histórico. Confira o registro em Histórico, onde você vê o histórico do documento ou o histórico dos dados.
-
Use os recursos adicionais. Visualize o dashboard e use os recursos adicionais: assine o documento ou adicione-o aos Favoritos, use Salvar como imagem ou exporte o dashboard para XLS ou PDF de várias formas. Você também pode iniciar uma apresentação do dashboard.
As opções de visualização mostram o dashboard como Dados, Planilha ou Gráficos, e o Painel lateral mostra os Anexos, Ações e Comentários usados no dashboard.
Vídeo: dashboards de KPI
Precisa de mais ajuda?
Escreva para nós. Em dias úteis, costumamos responder em até uma hora.