Cómo crear un nuevo dashboard
Traducción automática del inglés. Se muestra el original en inglés.
Use metric dashboards to track your metrics (KPIs) for different parts of your organization (e.g. sites), for partners (suppliers or customers) or for projects.
Create the dashboard
-
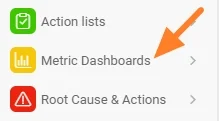
Open the module. Click the Metric Dashboards module.
-
Create a new dashboard. Click the Create New icon.
-
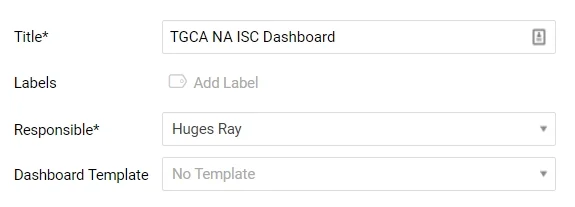
Fill in the main information. Complete the main information, such as Title, Responsible, etc.
-
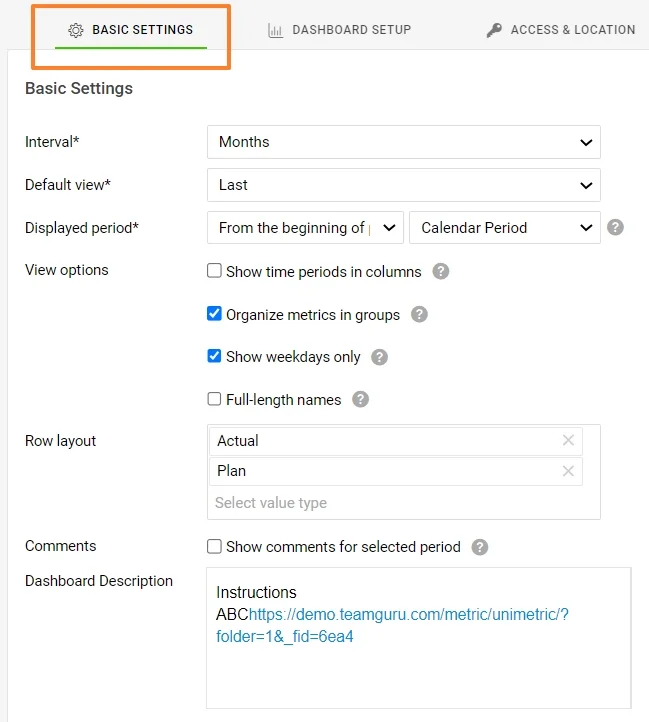
Define the basic settings. Define the default information on the Basic Settings tab, such as the interval, the default view, etc.
-
Save the basic data. When the basic data is filled in, click the Save button.
Add org. units, metrics and responsible people
-
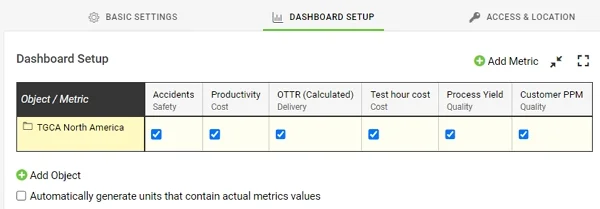
Add org. units and metrics. On the Dashboard Setup tab, choose your organization units and metrics by clicking the Add icons.
-
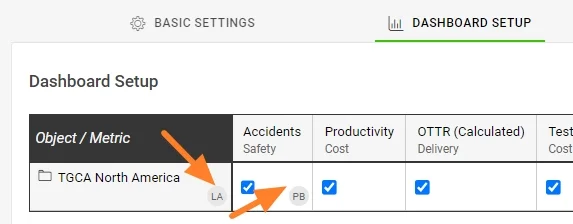
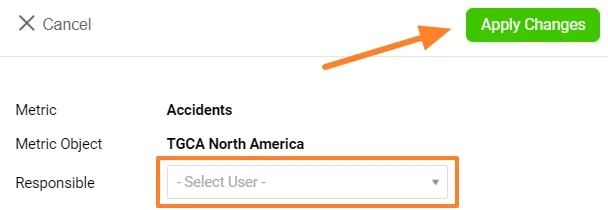
Add the responsible people. To add a Responsible person, click your org. unit (if they are responsible for the whole site), or click into the org. unit/metric cell (if they are responsible for a specific metric only). The responsible person’s initials are displayed next to it.
If the organization units are not set up in your TeamGuru yet, see How I manage the organization structure. If the metric you want to track is not defined in the system yet, see How to create a new metric. You need a sufficient role for this.
Set access and location
-
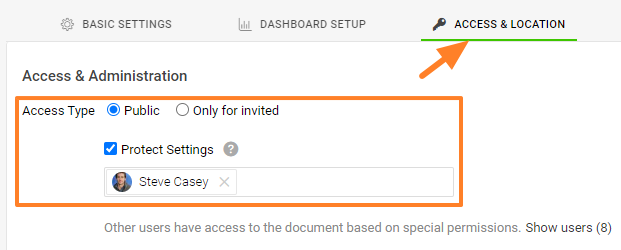
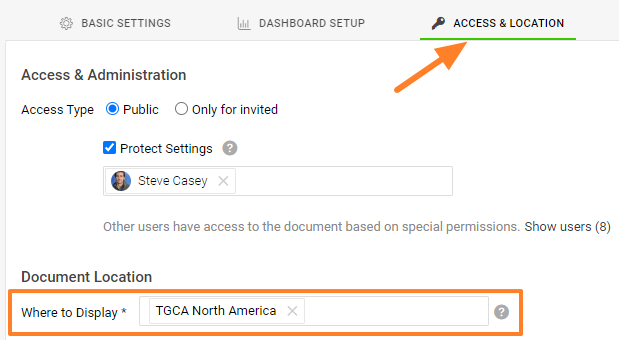
Choose the access type. Go to the Access & Location tab and select the Access Type: share your dashboard with everyone who has sufficient access, or only with invited people. If you choose Only for invited, select the invitees from the menu (they must be set up as active or passive users in the system). Passive users can only receive notifications, if any are set up.
Protect Settings: if you tick this box, only the responsible person and the selected document administrators can change the settings of this dashboard.
-
Set the document location. In Document Location, select where the new dashboard should be saved and displayed.
-
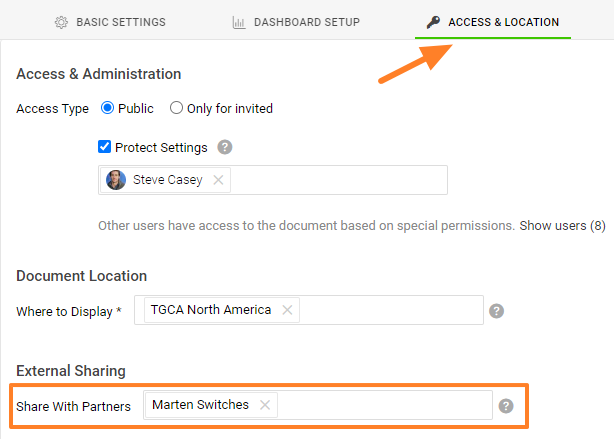
Share with external partners. You can share your document with External Partners: select the existing partners from the menu. If you need to create a new partner in the system, follow this link.
Connect documents and set up notifications
-
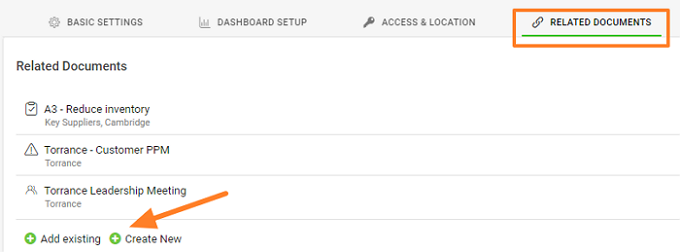
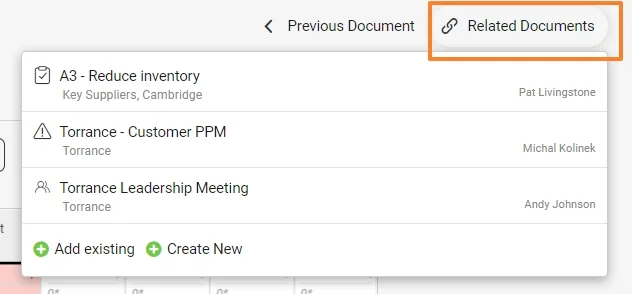
Set up related documents. Set up Related Documents on their tab. You then find these documents and their live links under the Related Documents button in the upper right corner above your document. You can also set up related documents directly from there.
-
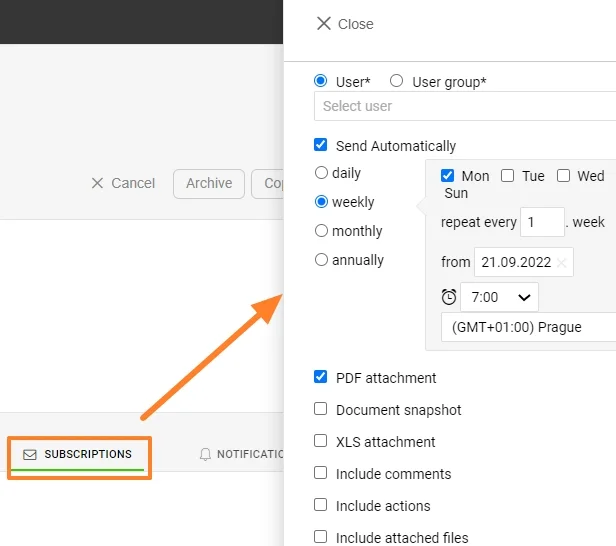
Set up subscriptions. Set up Subscriptions to receive notification emails.
-
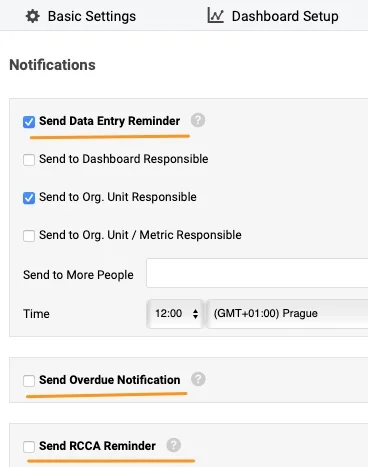
Set up notifications. Set up email Notifications to receive reminders.
Review and use the dashboard
-
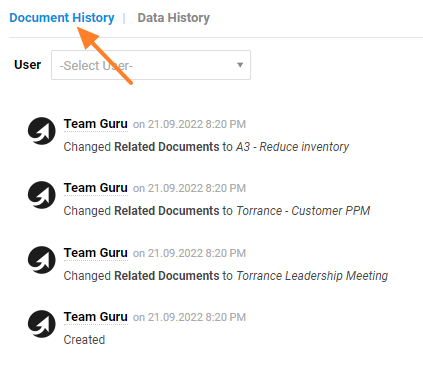
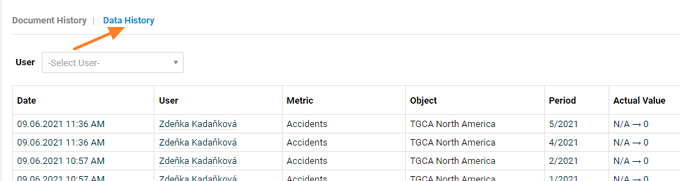
Check the history. Check the History log, where you can see the document history or the data history.

-
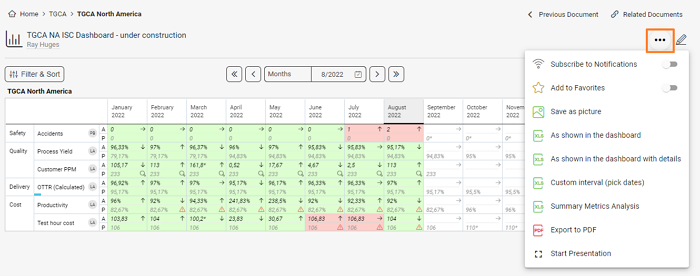
Use the additional features. View your dashboard and use the additional features: subscribe to your document or add it to Favorites, Save as picture, or export your dashboard to XLS or PDF in different ways. You can also start a presentation of your dashboard.
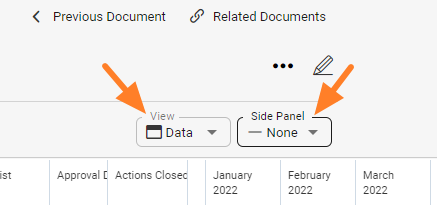
The view options let you see the dashboard as Data, Spreadsheet or Charts, and the Side Panel shows the Attachments, Actions and Comments used in the dashboard.
Video guide: Metric dashboards
Use los dashboards de KPI para dar seguimiento a sus indicadores en distintas partes de la organización (por ejemplo, plantas), con partners (proveedores o clientes) o en proyectos.
Crear el dashboard
-
Abra el módulo. Haga clic en el módulo Dashboards de KPI.
-
Cree un nuevo dashboard. Haga clic en el ícono Crear nuevo.
-
Complete la información principal. Complete la información principal, como Título, Responsable, etc.
-
Defina la configuración básica. En la pestaña Configuración básica, defina los valores predeterminados, como el intervalo, la vista predeterminada, etc.
-
Guarde los datos básicos. Cuando haya completado los datos básicos, haga clic en el botón Guardar.
Agregar unidades organizativas, indicadores y responsables
-
Agregue unidades organizativas e indicadores. En la pestaña Configuración del dashboard, elija sus unidades organizativas e indicadores con los íconos Agregar.
-
Agregue a los responsables. Para agregar un Responsable, haga clic en la unidad organizativa (si responde por toda la planta) o en la celda de unidad organizativa e indicador (si solo responde por un indicador concreto). Las iniciales del responsable aparecen al lado.
Si las unidades organizativas aún no están configuradas en su TeamGuru, vea Cómo gestionar la estructura organizativa. Si el indicador que quiere seguir aún no está definido en el sistema, vea Cómo crear un nuevo indicador. Para ello necesita un rol con permisos suficientes.
Configurar el acceso y la ubicación
-
Elija el tipo de acceso. Abra la pestaña Acceso y ubicación y elija el Tipo de acceso: comparta el dashboard con todos los que tengan acceso suficiente o solo con las personas invitadas. Si elige Solo para invitados, seleccione a los invitados en el menú (deben estar dados de alta como usuarios activos o pasivos en el sistema). Los usuarios pasivos solo pueden recibir notificaciones, si las hay configuradas.
Proteger configuración: si marca esta casilla, solo el responsable y los administradores del documento seleccionados pueden cambiar la configuración de este dashboard.
-
Indique la ubicación del documento. En Ubicación del documento, elija dónde se guardará y se mostrará el nuevo dashboard.
-
Compártalo con partners externos. Puede compartir el documento con Partners externos: elija los partners existentes en el menú. Si necesita crear un nuevo partner en el sistema, siga este enlace.
Vincular documentos y configurar notificaciones
-
Configure los documentos relacionados. Configure los Documentos relacionados en su pestaña. Encontrará estos documentos y sus enlaces activos en el botón Documentos relacionados, en la esquina superior derecha, encima del documento. También puede configurarlos directamente desde ahí.
-
Configure las suscripciones. Configure las Suscripciones para recibir notificaciones por correo electrónico.
-
Configure las notificaciones. Configure las Notificaciones por correo electrónico para recibir recordatorios.
Revisar y usar el dashboard
-
Revise el historial. Consulte el registro de Historial, donde ve el historial del documento o el de los datos.
-
Use las funciones adicionales. Abra el dashboard y use las funciones adicionales: suscríbase al documento o agréguelo a Favoritos, use Guardar como imagen o exporte el dashboard a XLS o PDF de varias formas. También puede iniciar una presentación del dashboard.
Las opciones de vista le permiten ver el dashboard como Datos, Hoja de cálculo o Gráficas, y el Panel lateral muestra los Adjuntos, las Acciones y los Comentarios del dashboard.
Video: dashboards de KPI
¿Necesita más ayuda?
Escríbanos. En días laborables solemos responder en menos de una hora.