Cómo configurar el encabezado del plan de acción
Traducción automática del inglés. Se muestra el original en inglés.
You can customize your project header in the action list template. A sufficient role is required to create or modify the template.
Follow this link to learn more about action list, checklist and corrective actions templates.
Set up the template
Open the template list
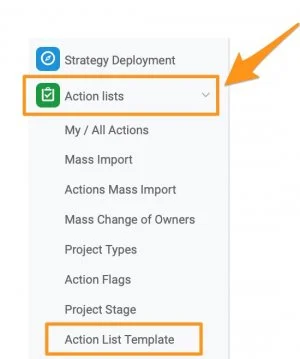
Go to the Action Lists module, click the drop-down menu arrow and select Action List Template from the submenu.
Create or edit a template
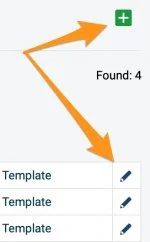
To create a new template, click the green plus button. To modify an existing template, click the edit pencil icon next to it.
Add the actions
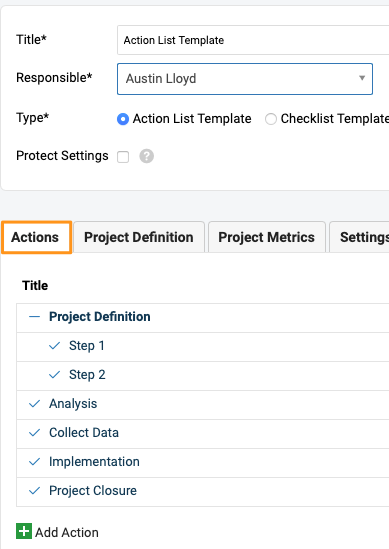
Define the template’s title, responsible person and protect settings. Add your actions on the Actions tab and define their offset dates, responsible person, approver, dependencies, etc.
Choose the header fields
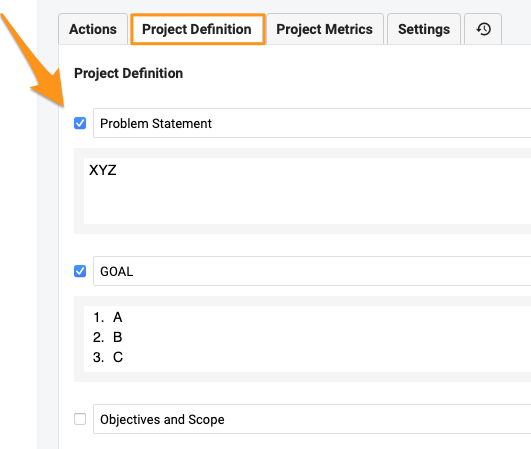
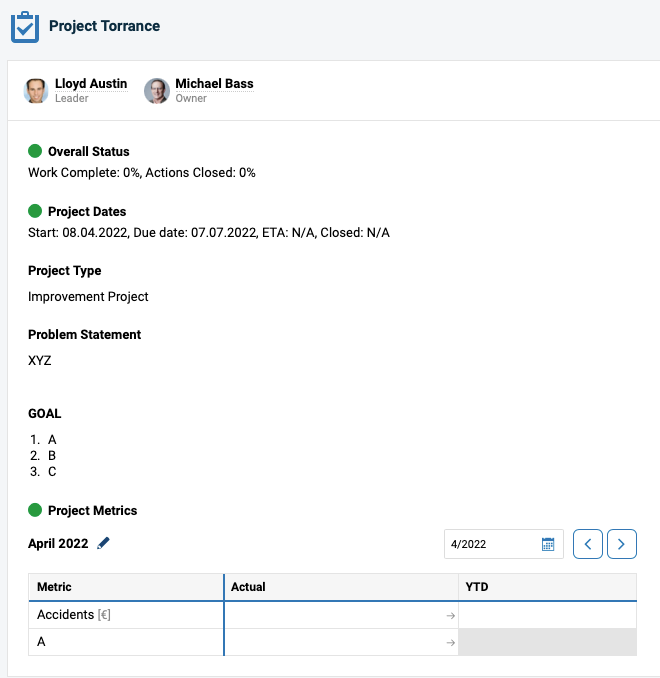
On the Project Definition tab, select the fields you want to display in your project header: simply tick or untick the box of each field. You can also pre-enter text. You can customize the header even further:
- Rename the header fields, such as Business Goal, Problem Statement, Objectives and others.
- Arrange the layout of the project sections and place them where they make the most sense for you (drag & drop).
- Predefine text in each section of the template and easily transfer it to your project. Please note that it can be overwritten at the document level.
- Add tables to your sections where applicable, for a simple and clear view.
- Display pictures to bring more visuals to your team.
Select the project metrics
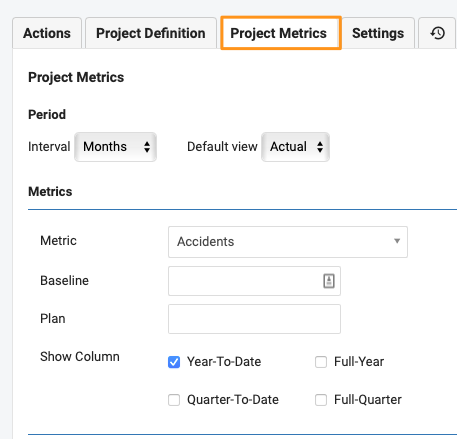
Select your Project Metrics.
Predefine the settings
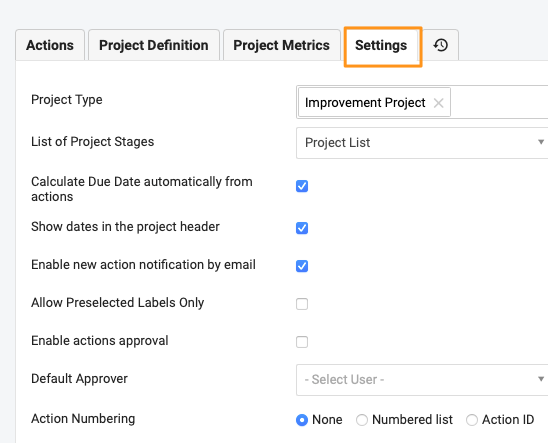
Predefine the other project Settings.
Create a project from the template
Create a new project
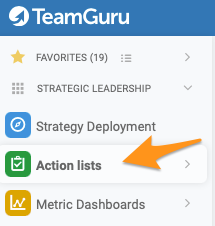
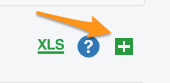
Once you have defined your action list template, you are ready to create a new project. Go to your action lists and click the green plus button on the right to create a new project.
Select the template
Define the main settings, such as title, labels, leader, etc., and select your template from the Action List Template submenu.
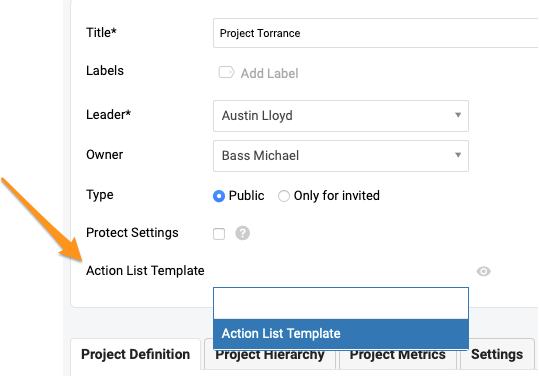
Preview the template
Use the eye icon to preview the actions and settings of the template.
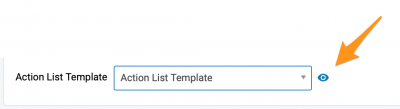
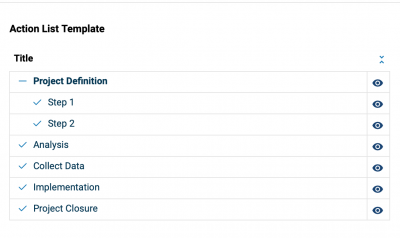
Choose where to display it
Select the location(s) Where to display your action list document.
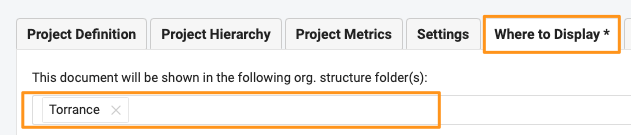
Save the action list
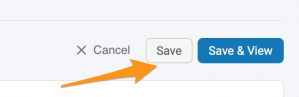
Save your action list.
Please note that you can also apply a template to an existing action list. However, if the text fields already contained text before you applied the new template, the predefined text from the template is not copied over.
Puede personalizar el encabezado del proyecto en la plantilla de plan de acción. Para crear o modificar la plantilla se necesita un rol con permisos suficientes.
Siga este enlace para saber más sobre las plantillas de planes de acción, checklists y acciones correctivas.
Configurar la plantilla
Abrir la lista de plantillas
Vaya al módulo Planes de acción, haga clic en la flecha del menú desplegable y seleccione Plantilla de plan de acción en el submenú.
Crear o editar una plantilla
Para crear una plantilla, haga clic en el botón verde de suma. Para modificar una plantilla existente, haga clic en el icono del lápiz de edición junto a ella.
Agregar las acciones
Defina el título de la plantilla, el responsable y la protección de la configuración. Agregue las acciones en la pestaña Acciones y defina sus fechas relativas, responsable, aprobador, dependencias, etc.
Elegir los campos del encabezado
En la pestaña Definición del proyecto, seleccione los campos que quiere mostrar en el encabezado del proyecto: basta con marcar o desmarcar la casilla de cada campo. También puede escribir texto de antemano. Puede personalizar el encabezado aún más:
- Cambie el nombre de los campos del encabezado, como Objetivo de negocio, Descripción del problema, Objetivos y otros.
- Organice la disposición de las secciones del proyecto y colóquelas donde tengan más sentido para usted (arrastrar y soltar).
- Predefina texto en cada sección de la plantilla y trasládelo fácilmente a su proyecto. Tenga en cuenta que se puede sobrescribir a nivel de documento.
- Agregue tablas a sus secciones cuando corresponda, para una vista simple y clara.
- Muestre imágenes para dar a su equipo un apoyo más visual.
Seleccionar las métricas del proyecto
Seleccione las Métricas del proyecto.
Predefinir la configuración
Predefina el resto de la Configuración del proyecto.
Crear un proyecto a partir de la plantilla
Crear un proyecto
Una vez definida la plantilla de plan de acción, ya puede crear un proyecto. Vaya a sus planes de acción y haga clic en el botón verde de suma de la derecha para crear un proyecto.
Seleccionar la plantilla
Defina la configuración principal, como el título, las etiquetas, el líder, etc., y seleccione su plantilla en el submenú Plantilla de plan de acción.
Ver una vista previa de la plantilla
Use el icono del ojo para ver una vista previa de las acciones y la configuración de la plantilla.
Elegir dónde mostrarlo
Seleccione las ubicaciones en Dónde mostrar su documento de plan de acción.
Guardar el plan de acción
Guarde su plan de acción.
Tenga en cuenta que también puede aplicar una plantilla a un plan de acción existente. Sin embargo, si los campos de texto ya tenían texto antes de aplicar la nueva plantilla, el texto predefinido de la plantilla no se copia.
¿Necesita más ayuda?
Escríbanos. En días laborables solemos responder en menos de una hora.