如何为标准文档添加标签
本文由英文机器翻译。 当前显示英文原文。
Mark your related and standard documents with the same label, and search across all documents quickly and easily.
Video Guide (text instructions are below the video)
To create a new label, you have to be set up with a sufficient role. There are two ways to create a new label: in the system settings, or directly in a document in one step.
Create a label in the system settings
Open the label settings
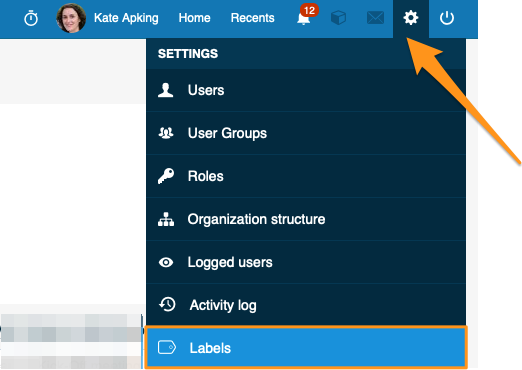
Click the settings button in the upper right corner of your TeamGuru page and choose Labels from the submenu.
Add a new label
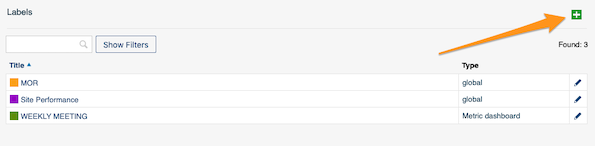
Create a new label by clicking the green plus button.
Set the title, scope and color
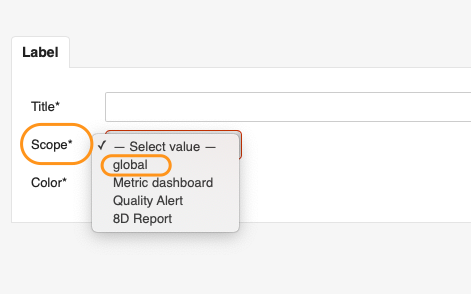
Fill in the Title, Scope and Color. In the scope, you can choose whether the label applies only to Metric dashboards, Quality alerts or 8D reports, or select Global to use it in all three modules.
Choose the locations
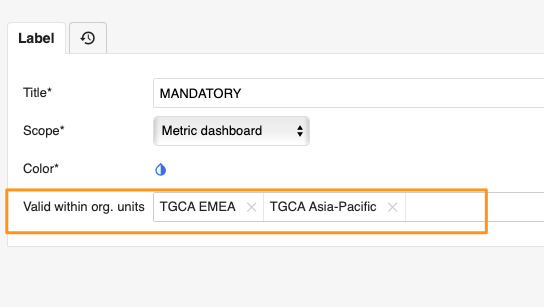
You can also choose the locations (org. unit folders) where the label will be primarily used.
Find the label in the filter
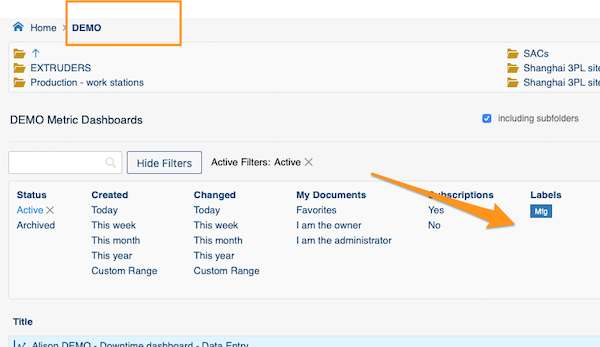
Once the label is added to at least one document, it is displayed in the document filter under the selected org. unit folders.
The exception is a label that already existed in the system and was used for a document in a different location before you selected the locations. Such a label is displayed under that other folder too.
Create and add a label in one step
Open the document settings
Go to the document settings by clicking the edit pencil button.

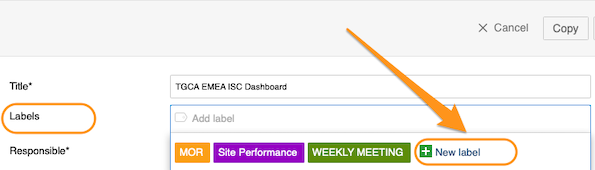
Create the label and select it
Create a new label by clicking the green plus button Create New Label, then select the label for your document.
Add a label to your document
Select labels in the document settings
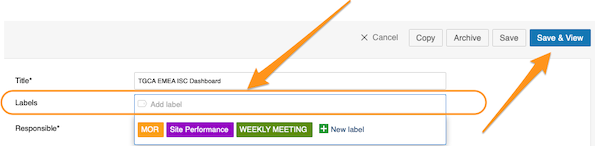
This works the same way as creating and adding a label in one step. Go to your document settings, click into the Labels field and choose from the available options. Click Save or Save & View once you have made your selection.
Labels offered for the document location
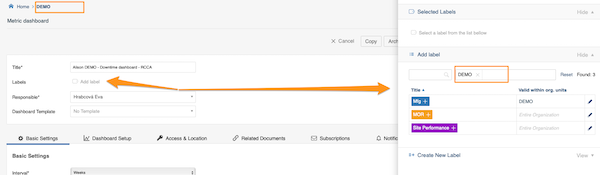
When you add labels to your document, only the labels for that location are offered: the system automatically sets the location in the filter to the document’s location.
Use labels from other locations
Even though a label’s location is specified, users from other locations can still use it too. They just delete the location from the filter, and all labels created and available in the system are shown.
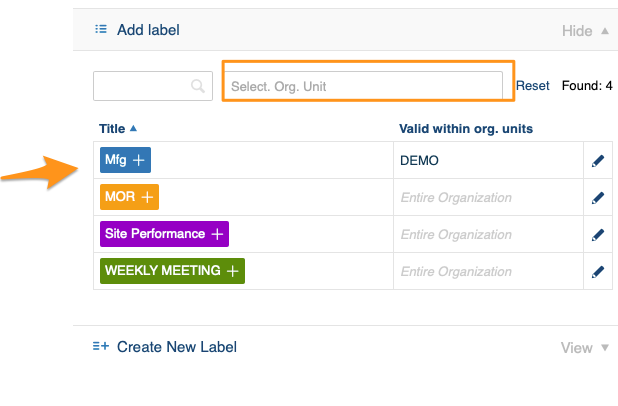
Search documents by labels
Select the folder
Select the folder where you want to search for your document. Don’t forget to tick the Including subfolders checkbox if you want to see documents from all the subfolders.
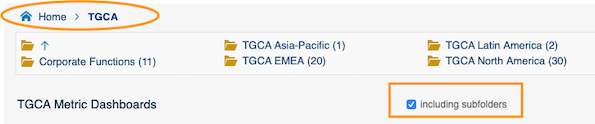
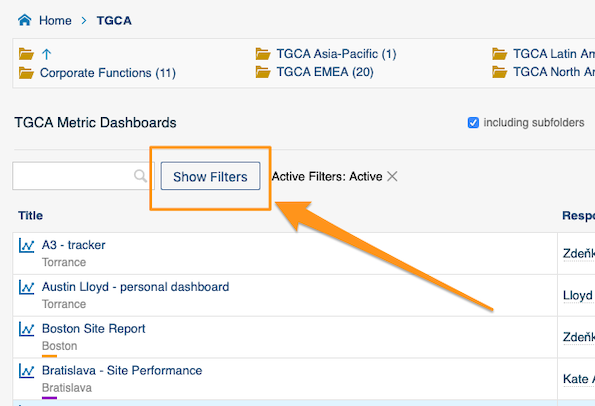
Show the filters
Click Show Filters next to the search field.
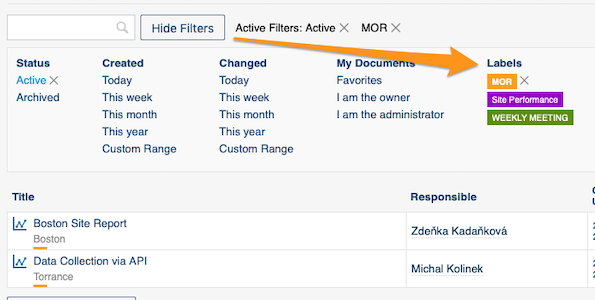
Select your label
Select your label in the filter.
Related article: How to preselect labels in your project
为相关文档和标准文档添加相同的标签,即可在所有文档中快速轻松地搜索。
视频指南(文字说明见视频下方)
要创建新标签,您需要具备相应的角色。创建新标签有两种方式:在系统设置中创建,或直接在文档中一步完成。
在系统设置中创建标签
打开标签设置
点击TeamGuru页面右上角的设置按钮,从子菜单中选择 标签。
添加新标签
点击绿色加号按钮创建新标签。
设置标题、范围和颜色
填写 标题、范围 和 颜色。在范围中,可以选择标签仅适用于指标仪表板、质量警报或8D报告,或选择 全局 在这三个模块中通用。
选择位置
您还可以选择主要使用该标签的位置(组织单元文件夹)。
在筛选器中查找标签
标签至少添加到一个文档后,就会显示在所选组织单元文件夹下的文档筛选器中。
例外情况:如果某个标签在您选择位置之前就已存在于系统中,并已用于其他位置的文档,则该标签也会显示在那个文件夹下。
一步创建并添加标签
打开文档设置
点击编辑铅笔按钮进入文档设置。
创建并选择标签
点击绿色加号按钮 新建标签 创建新标签,然后为文档选择该标签。
为文档添加标签
在文档设置中选择标签
操作方法与一步创建并添加标签相同。进入文档设置,点击 标签 字段,从可用选项中选择。选择完成后,点击 保存 或 保存并查看。
按文档位置提供的标签
为文档添加标签时,系统只提供该位置的标签:系统会自动将筛选器中的位置设为文档所在位置。
使用其他位置的标签
即使标签已指定位置,其他位置的用户仍然可以使用。只需从筛选器中删除位置,系统中已创建的所有可用标签就会显示出来。
按标签搜索文档
选择文件夹
选择要搜索文档的文件夹。如需查看所有子文件夹中的文档,别忘了勾选 包含子文件夹 复选框。
显示筛选器
点击搜索框旁的 显示筛选。
选择标签
在筛选器中选择标签。
相关文章: 如何在项目中预选标签
还需要帮助吗?
请给我们留言。工作日我们通常会在一小时内回复。